Okay, FOR REAL. Can we just level for a minute about snacks? Because let’s be honest, most days it feels like choosing between eating cardboard labeled “healthy” or face-planting into a pile of actual cookies and dealing with the sugar coma later. The struggle is SO real, right?!
But HOLD UP. I think I’ve figured out the secret. Or at least, I’ve found a recipe that lets me enjoy my fix of chocolate without feeling the need to immediately start training for a 10K. Guys I’m talking about healthy chocolate chip oatmeal bars. No I’m not kidding. They’re seriously good.
Imagine this: You’re craving something chewy, sweet, satisfying… maybe with little melty bits of chocolate? (Duh, always). You grab one of THESE. It tastes incredible. You feel… good? Not weighed down? IT’S POSSIBLE. These things have become my secret weapon for surviving that 3 PM slump, grabbing something quick before I race out the door, or even tricking myself into a “healthy” dessert. They’re just… clutch. You HAVE to try them. Seriously. Stop scrolling Pinterest fails and let’s actually make something awesome.
Why I’m Basically Shouting About These Bars From the Rooftops
- They Don’t Taste Like Sadness: Unlike some “healthy” things, these actually taste GOOD. Like, “might accidentally eat half the pan” good. Chewy, oaty, chocolatey perfection.
- Real Energy, Not Fake Hype: Oats are the bomb. They actually keep you going instead of that sugar rush followed by crashing onto the couch. Your body will probably thank you.
- Kid-Tested, Mother-Approved (Really!): My tiny humans, who normally run screaming from anything remotely nutritious, will actually ask for these. It’s wild. And less junk food stress for me? YES PLEASE.
- Your Go-To for Everything: Need breakfast? Done. Post-workout bite? Perfect. Lunchbox filler? Genius. Late-night munchies? Oh yeah. They just fit.
The Nitty-Gritty (It’s Barely Gritty, It’s Easy!)
- Fuss Level: Minimal. Like, 10-15 minutes of actual effort, max.
- Oven Hangout Time: 20-25 minutes. Go fold that pile of laundry you’ve been ignoring. Or don’t. I won’t judge.
- Can You Mess It Up? Probably not easily! Super beginner-friendly.
- How Many Do You Get? Usually around a dozen bars. Ish. Depends if you snack while cutting… ahem.
Okay, Your Mission Briefing: Grab This Stuff
Don’t panic, it’s all normal stuff, promise!
- Rolled Oats: The old-fashioned kind, not the quick-cooking dust. You need that chew! (1 ½ cups)
- Nut Butter Friend: Almond, peanut, cashew… whatever creamy nutty goodness you have lurking in the cupboard is probably fine. (½ cup)
- Sweet Sticky Stuff: Maple syrup is awesome, honey works too. Your call! (⅓ cup)
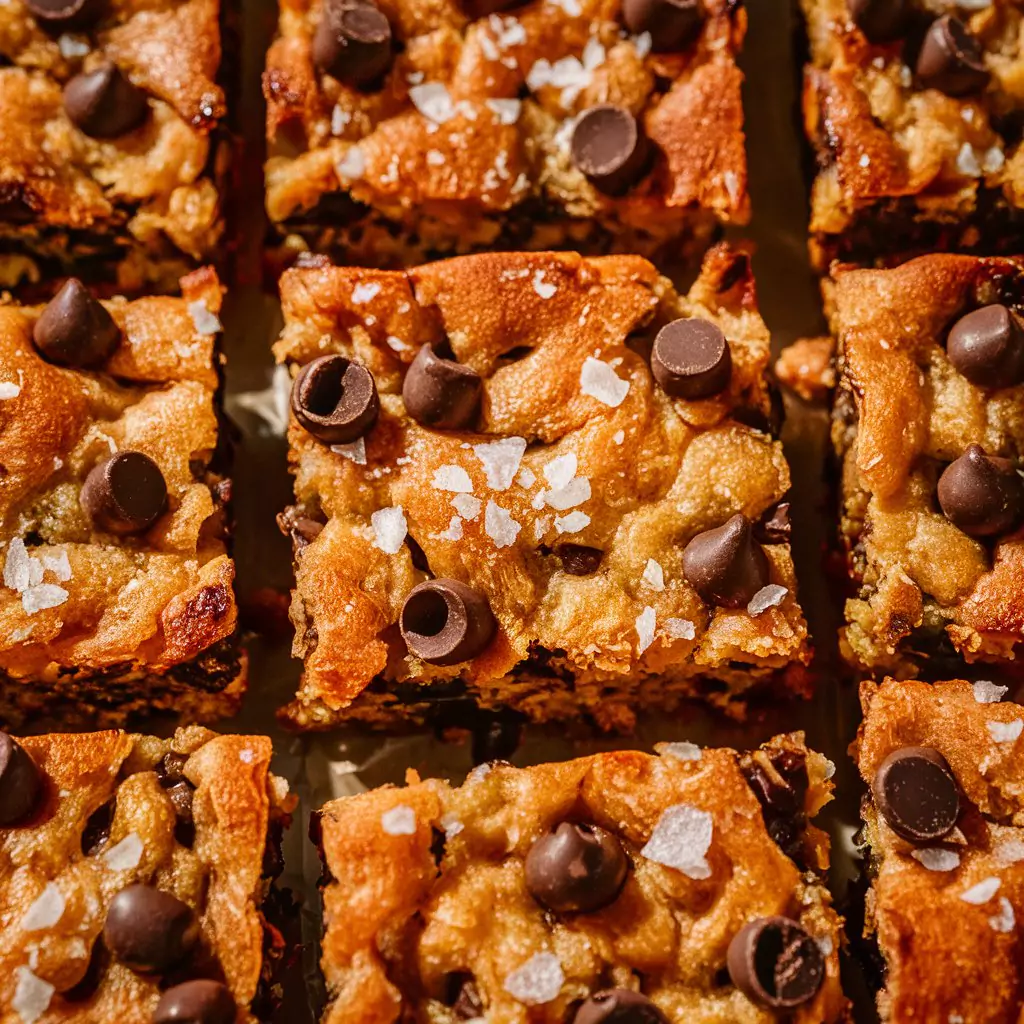
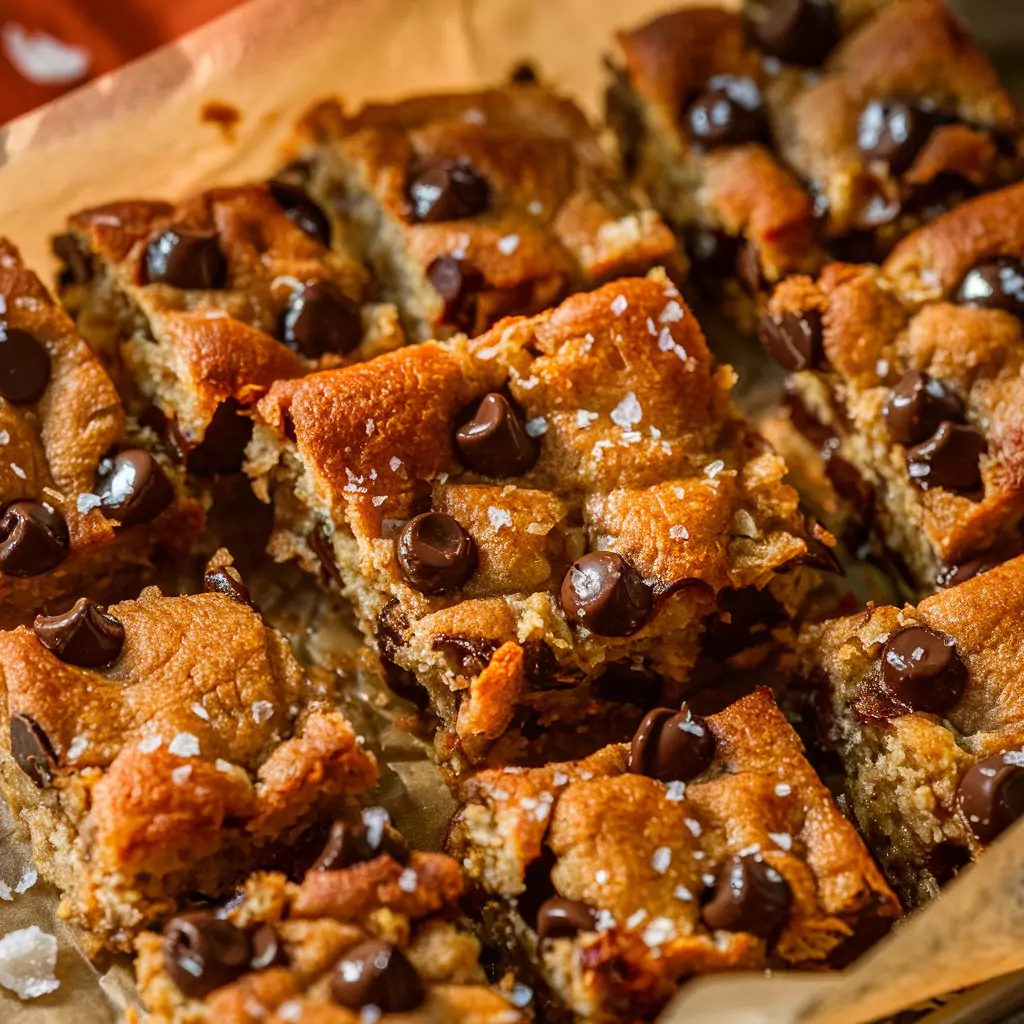
- CHOCOLATE CHIPS: The main event! Dark chocolate feels fancy and slightly more virtuous. (½ cup… or, you know, more. Pour ’til your heart says stop.)
- Vanilla Extract: That magic flavor booster. Just a teaspoon (1 tsp).
- Salt: Tiny pinch! Like ¼ teaspoon. Don’t skip it, it makes the sweet stuff sweeter.
Wanna Get Crazy? Mix It Up! (Permission Granted)
- Gluten Concerns? Easy fix: Use oats labeled “gluten-free.” Problem solved.
- Nut-Free Zone? Sunflower seed butter totally works! Great swap.
- More Texture? YES. Chop up some walnuts! Throw in some pumpkin seeds! Dried cranberries? Shredded coconut? Do it! Live your best life!
- Less Sugar Quest? Sugar-free chocolate chips are a thing! Or go hardcore with cacao nibs for intense chocolate without the sweet.
Let’s DO This Thing: Baking Time!
Okay, put on some music, take a breath. You got this.
- Fire Up the Oven: 350°F (175°C). While it’s warming up like a champ, find that trusty 8×8 pan. Line it with parchment paper – you know, the baking paper stuff. Crucial step: Leave some paper hanging over the sides like little wings. Makes getting the bars out WAY less dramatic later.
- Gooey Time: Bowl! Dump in the nut butter and maple syrup/honey, and vanilla. Stir it up like you mean it. Get it smooth and dreamy. Lick the spoon if you want (no judgment).
- The Big Dump: Now add the oats, salt, and CHOCOLATE. All of it. Stir, stir, stir. Make sure every little oat gets coated in deliciousness, put some elbow grease into it!
- Press It Real Good: Scrape ALL that goodness into the pan. Now, using your clean hands (best tool!) or a spatula, press it down. Like, really pack it in there. Flat, even, squished into the corners. Show it who’s boss.
- Into the Hot Box! Slide that beautiful pan into the oven. Set a timer for 20 minutes. Now WALK AWAY. Go do something else. Check it after 20 – edges looking kinda golden? Middle looks set (not jiggly)? If yes, pull it! If not, give it another few minutes, up to 25 total. Your house is gonna smell like HEAVEN.
- THE WAITING GAME (UGH!): Okay, this part sucks. You HAVE to let the pan cool. Completely. On the counter. Don’t even LOOK at it funny. If you try to cut these warm, you’ll have hot oat crumble (tasty, but not bars). Resist the urge! Once it’s totally cool (give it a good hour, maybe more!), use those parchment wings to lift the whole slab out. THEN you can cut it into glorious bars. Victory!
Whoops! Avoid These Facepalm Moments
- Don’t Cremate Them: Seriously, watch those edges. Golden = Done. They firm up as they cool. Overbaked = Sad, dry hockey pucks. Nobody wants that.
- Patience With Cooling! Yes, I’m nagging. But warm bars = crumbly mess. Cool bars = perfect chewy squares. Trust the cool-down!
Wanna Get Fancy? (You Extra Thing, You)
- Melt more chocolate. Drizzle it artfully (or haphazardly) on top. Instant upgrade.
- While the drizzle is wet, hit it with a tiny sprinkle of flaky sea salt. Chef’s kiss.
- Cut ’em super neat if you’re trying to impress someone (or just yourself).
(Honestly, they’re amazing even if they look a little rustic. Taste > Looks, always.)
Keeping Your Treasure Safe (AKA Storage)
- Fridge Life: Best bet. Airtight container. They’ll stay chewy and awesome for up to a week (hah! As if they’ll last that long).
- Freeze Power: YES! Wrap ’em individually (plastic wrap, foil, little baggies) and freeze. Snack salvation awaits for months! Thaw on the counter or nuke for a few seconds.
- Meal Prep Magic: Bake on Sunday, eat all week. You’re basically a domestic god/goddess.
Go Wild! Riff On It!
Now that you know the basics, play!
- Vegan Vibes: Use maple syrup + dairy-free chips. Done and done.
- Nutty Overload: Add ALL the nuts! Walnuts, pecans, almonds – party in a pan!
- Fruity Burst: Dried cherries, cranberries, chopped dates? Go for it!
Okay, Seriously, Just Go Make Them.
That’s it. That’s the whole spiel. My PSA for better snacking. These Healthy Chocolate Chip Oatmeal Bars are easy, they’re relatively good for you and they taste ridiculously good. Stop reading and start baking! Your taste buds (and your sanity) will thank you. Let me know if you make ’em – go enjoy!
Recipes You May Like

Healthy Chocolate Chip Oatmeal Bars
Craving Healthy Chocolate Chip Oatmeal Bars? This easy recipe uses chewy oats & chocolate for a quick, guilt-free snack. Try this simple bake!
Ingredients
- 1/2 cup rolled oats (choose traditional for a better chew!)
- 1/2 cup almond butter (or peanut butter, or sunflower seed butter—whatever creamier you prefer!)
- 1/3 cup maple syrup (or honey works great too!)
- 1/2 cup dark chocolate chips (or more... follow your heart!)
- 1 teaspoon vanilla extract (don't miss this recipe!)
- 1/4 teaspoon salt (just a pinch!)
Instructions
- First up get that oven nice and hot and crank it to 350°F (175°C). Find an 8x8 inch baking pan and line it with parchment paper, leaving some hanging over the sides like little handles (trust me on this).
- Grab a decent-sized bowl. Dump in the almond butter (or whatever you're using), maple syrup (or honey), and the vanilla. Stir it all together until it's smooth and creamy.
- Now toss in the rolled oats, the salt, and those yummy chocolate chips. Mix it really well until everything looks coated and happy together.
- Scoop the whole mixture into your lined pan. Use your hands or a spatula to press it down FIRMLY and evenly. Get it right into those corners! Make it nice and compact.
- Pop it in the oven, bake for about 20-25 minutes. You're looking for the edges to be just starting to turn golden brown and the middle to look set.
- Okay the hardest part: Be Patience! Once it's out of the oven, let the pan cool completely on a wire rack. Like totally and completely cool. Don't rush it! Once it's cool, use the parchment paper handles to lift the whole thing out then slice into bars. Done!
Notes
Don't overbake, Honestly remove them when the edges are golden brown. They'll firm up as they cool and you want them chewy not crispy.
Cooling is key: I know I say it all the time but letting them cool completely is crucial so they don't crumble when you cut them. Patience pays off!
Storage: Keep these delicious treats in an airtight container in the refrigerator for up to a weeeek.
There are no reviews yet. Be the first one to write one.