
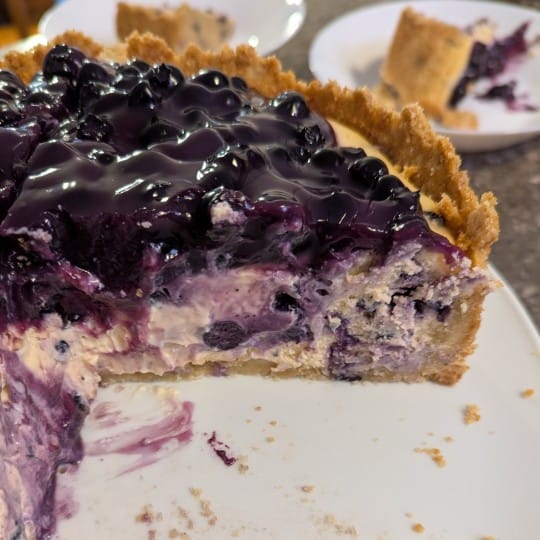
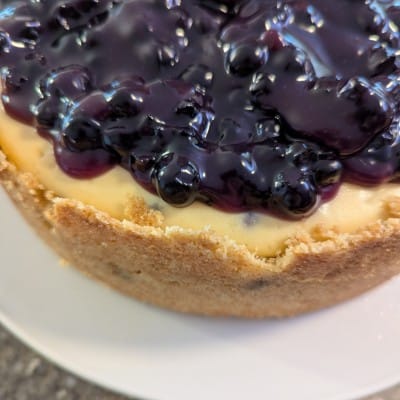
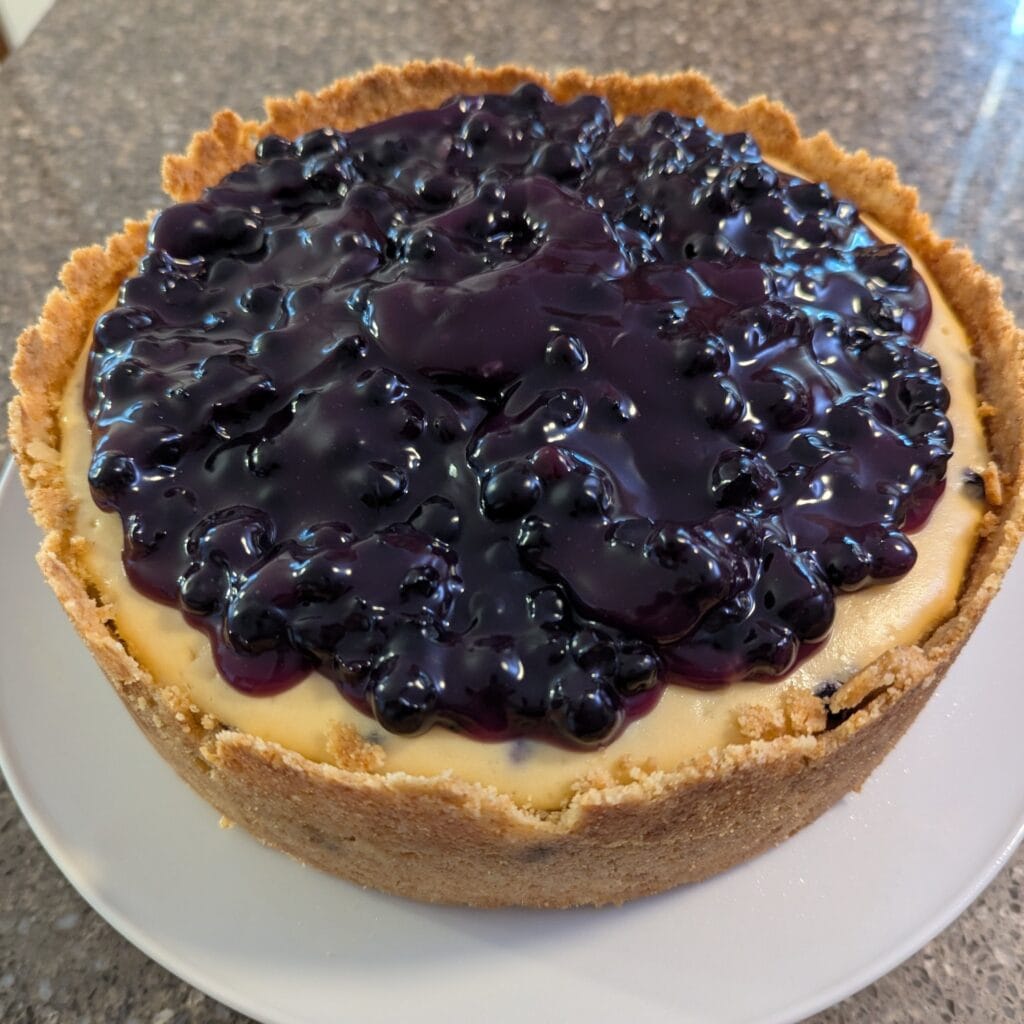
Let me tell you about this blueberry cheesecake recipe. You’ve seen pictures like it, right? That towering, golden graham cracker crust holding in the creamiest, dreamiest cheesecake filling, all smothered in shiny, perfect blueberries? Yeah. I saw one just like that ages ago and basically became obsessed. Like, had-to-make-it-myself obsessed.
My first few attempts? Uh, let’s just say they were… humbling. We’re talking cracks like the Grand Canyon, middles that sank like the Titanic, and crusts that just gave up on life. It took me probably seven tries, fuelled by stubbornness and way too much “quality control” taste-testing (hey, someone had to!), but I finally cracked the code. This isn’t just a recipe; it’s the recipe. The one that gets actual gasps when I bring it out. It hits that perfect sweet spot – stunning looks, knock-your-socks-off taste, and honestly? Totally doable, even if you think cheesecakes are scary.
What You’ll Need (aka Your Cheesecake Toolkit)
Alright, let’s get our ducks in a row. For this blueberry cheesecake recipe to truly sing, good ingredients matter, especially the cream cheese. Go full-fat, please! No regrets.
For That Epic Graham Cracker Crust:
- Graham Cracker Crumbs: About 2 ½ cups worth. If you’re crushing your own, that’s around 18-20 full crackers. Hot tip: Food processor makes quick work of this, or buy the crumbs if you’re feeling lazy (no judgment!). Sometimes I swap for digestive biscuits if I’m feeling fancy.
- Unsalted Butter: One glorious stick (½ cup / 113g), melted until it’s liquid gold.
- Granulated Sugar: Just ⅓ cup (67g). Keeps the crust from being too sweet.
- A Tiny Pinch of Salt: Seriously, don’t skip it. It makes everything else taste better.
For the Silky Smooth Filling:
- Full-Fat Cream Cheese: The MVP! Grab 32 oz (four 8oz blocks / 904g). And I cannot stress this enough: let it sit on your counter for at least 2-3 hours until it’s properly soft. Cold cream cheese is the enemy of smooth cheesecake – trust me, I’ve learned the lumpy way. Philly works great, but any good quality brand will do.
- Granulated Sugar: 1 ¾ cups (350g). Yep, it looks like a mountain, but it’s needed for that perfect texture and tang balance.
- All-Purpose Flour OR Cornstarch: ¼ cup (30g) of flour OR 3 tablespoons cornstarch. This little bit of magic helps stop those dreaded cracks. Pick your player!
- Vanilla Extract: 1 teaspoon. Use the real stuff if you can!
- Lemon Zest: About ½ teaspoon (optional, but HIGHLY recommended). It just wakes everything up without tasting like lemon pie.
- Large Eggs: Four of ’em. Let these hang out on the counter with your cream cheese so they’re room temp too. Cold eggs = trouble.
- Heavy Cream OR Full-Fat Sour Cream: ½ cup (120ml), room temp, naturally. Heavy cream is pure richness; sour cream adds a bit more zing. I personally lean towards sour cream, but you do you!
- Optional Blueberries for Swirling: 1 to 1½ cups fresh or frozen blueberries. This is your “wow” moment — fold ’em into the batter or swirl ’em in for a dramatic, fruity twist. Totally optional, totally worth it.
For That Amazing Blueberry Topping:
- Blueberries: Three big ol’ cups. Fresh is awesome, frozen is totally fine (don’t even thaw ’em!).
- Granulated Sugar: ½ cup (100g). Taste your berries – if they’re super sweet, maybe use a touch less sugar. If they’re tart, maybe a smidge more. You’re the boss.
- Water: ¼ cup (60ml).
- Cornstarch: 2 tablespoons. This is our thickener for that gorgeous, glossy sauce.
- COLD Water: 2 tablespoons. Super important this water is cold when you mix it with the cornstarch to make a slurry. Otherwise? Clump city.
- Lemon Juice: 1 tablespoon, fresh squeezed if possible. It just makes the blueberries taste more blueberry-y.
The Time Commitment (Spoiler: It’s Mostly Waiting!)
Okay, let’s be real. Making this showstopper takes time, but most of it is just chilling (literally). Here’s the breakdown:
- Hands-On Time: Maybe 30-40 minutes total? Getting the crust ready, mixing the filling, simmering the sauce. Not bad!
- Baking Time: About 1 hour 10 minutes in the oven.
- The Waiting Game (Crucial!): This is where patience comes in. It needs about 1 hour to cool in the oven with the door cracked, then another hour or two on the counter to cool completely, THEN at least 4 hours in the fridge. Honestly? Overnight is the gold standard for flavor and slicing ease.
- Total Time (Start to Finish): Minimum about 7 hours, but realistically, plan on making it the day before you want that first perfect slice.
Real talk: Waiting sucks, I know! But please, please don’t rush the chill. It needs that time to set up properly. Think of it as an investment. Pop it in the fridge, forget about it, go live your life, and come back to cheesecake glory. This blueberry cheesecake recipe is your reward for patience!
Let’s Bake This Thing! Your Step-by-Step Playbook
Okay, apron on? Let’s do this! It’s easier than you think.
Step 1: Build That Crust Foundation
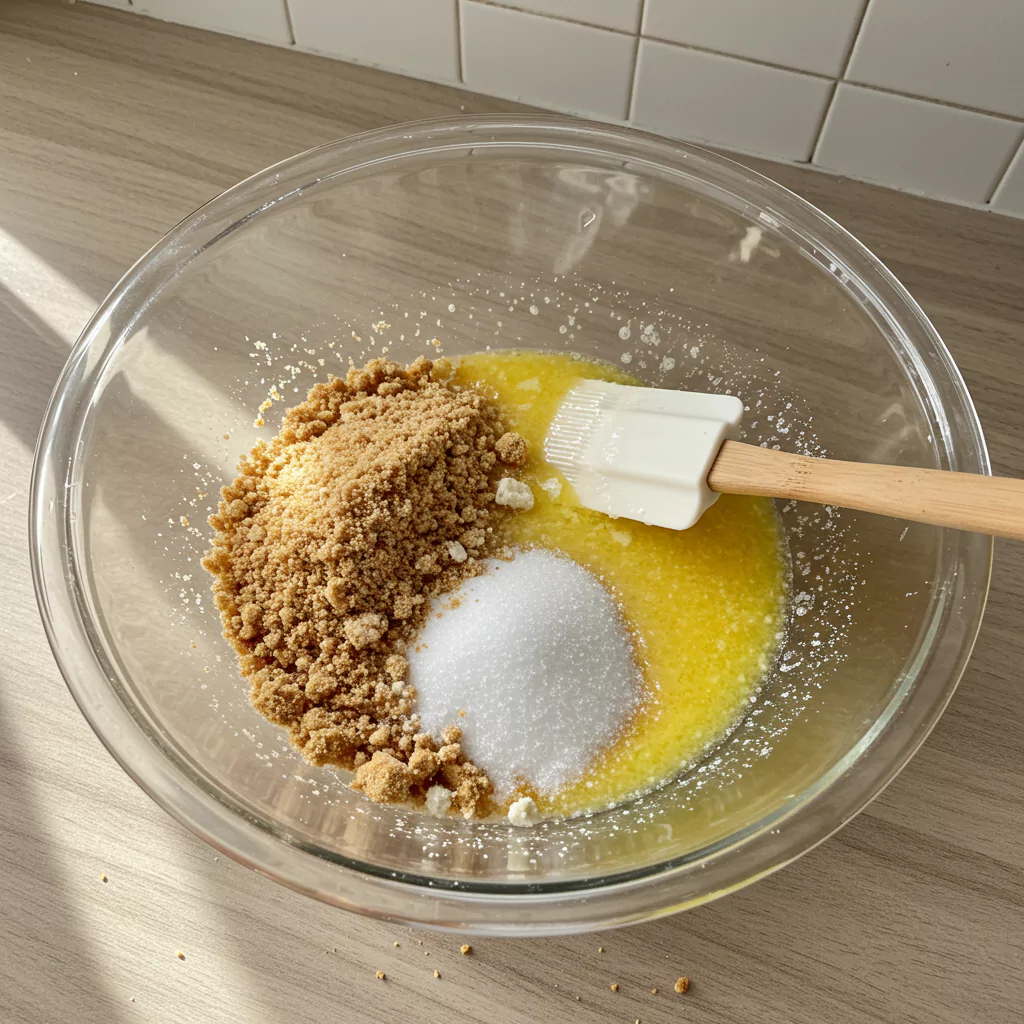
First up, crank your oven to 350°F (175°C). Grab your 9-inch springform pan (the kind with the removable sides). No need to grease it. In a bowl, stir together the graham cracker crumbs, that ⅓ cup sugar, and the pinch of salt. Pour in your glorious melted butter and mix it all up until it looks like damp sand and smells amazing. Tip this mixture into the springform pan. Now, get pressing! Use your fingers or the bottom of a flat glass to pack the crumbs firmly onto the bottom and right up the sides. Aim for at least an inch, maybe an inch and a half high – that’s key for the look we’re after! Pop it in the oven for 10 minutes to set. Take it out and let it cool on a wire rack while you tackle the filling.
Step 2: Create the Creamiest Filling Ever
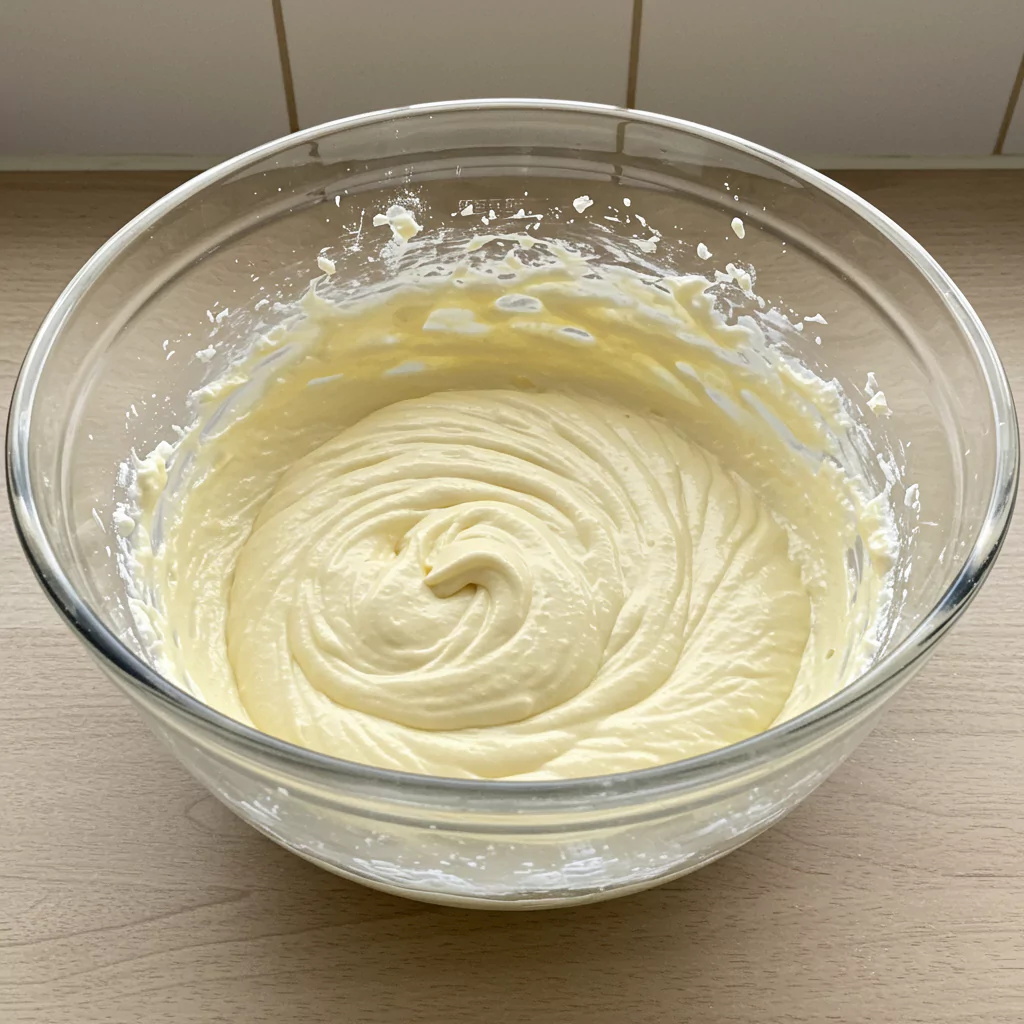
Alright, deep breaths. Remember: room temperature ingredients! Grab your biggest bowl and an electric mixer (handheld is fine, stand mixer with the paddle is great). Beat the softened cream cheese on medium speed until it’s totally smooth. No lumps allowed! Scrape down the bowl really well – lumps hide! Gradually pour in the 1 ¾ cups sugar and the flour (or cornstarch), mixing on low speed until it’s just combined. Seriously, stop mixing as soon as it comes together. Overmixing = tough cheesecake. Stir in the vanilla and lemon zest. Now for the eggs: add them one at a time, mixing on low speed just until the yellow disappears. Don’t go wild here! Too much air = cracks later. Lastly, gently fold in the room temp heavy cream or sour cream just until it’s blended. The batter should feel thick, smooth, and luxurious. Resist the urge to eat it all with a spoon (or don’t, I won’t tell).
Optional blueberry swirl moment: If you’re feeling extra, you can fold in 1 to 1½ cups of fresh or frozen blueberries right into the batter before pouring it into the crust. Or go full drama with a few spoonfuls of blueberry sauce swirled through the filling using a butter knife. It looks fancy, tastes divine, and doubles the blueberry joy.
Step 3: Assemble, Bake, and Chill (Figuratively and Literally)
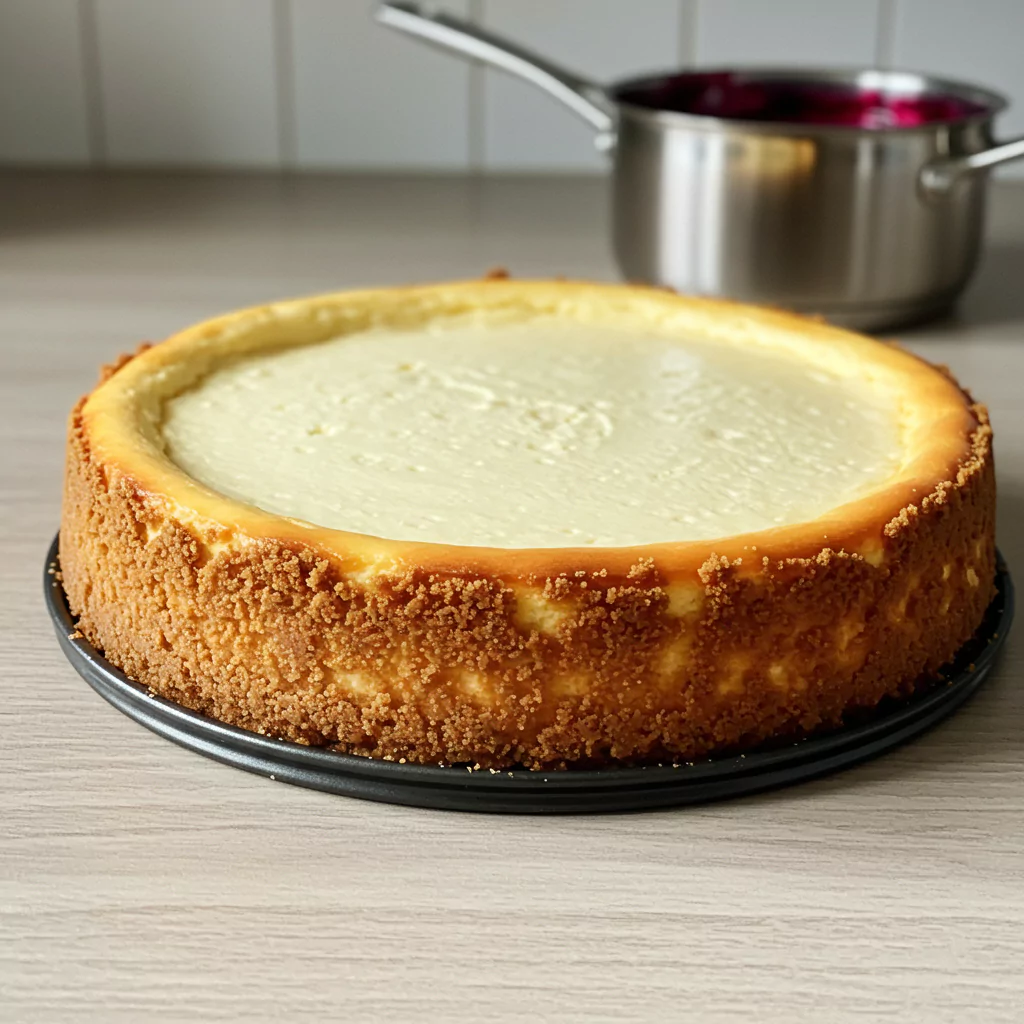
Gently pour that gorgeous filling into your waiting crust. Smooth the top with an offset spatula or the back of a spoon. Okay, baking time! Place the springform pan on a baking sheet (just in case!). Bake at 350°F (175°C) for 15 minutes. THEN – important step – turn the oven temp down to 250°F (120°C) and keep baking for about 55-60 minutes more. This gentle heat is key for creamy texture and preventing cracks. How do you know it’s done? The edges should look set, but the very center should still have a little wiggle when you gently nudge the pan. Not sloshy, just… jiggly. Perfect. Now, turn the oven OFF. Prop the oven door open a crack (use a wooden spoon handle!) and let the cheesecake cool down in the oven for 1 whole hour. Slow cooling = happy cheesecake. After that hour, bring it out and let it cool completely on a wire rack on your counter. No fridge yet!
Step 4: Whip Up That Brilliant Blueberry Topping
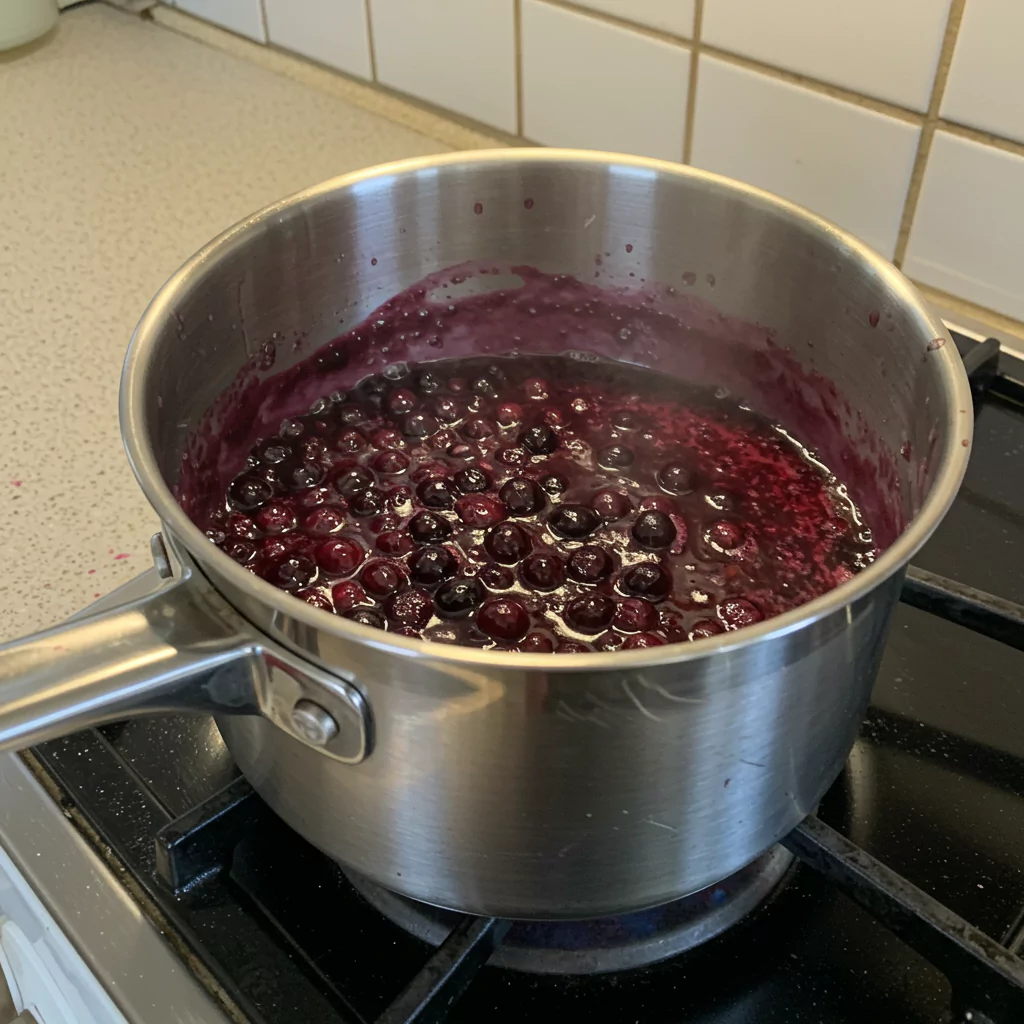
You can do this while the cheesecake cools, or even make it ahead. Grab a saucepan and toss in the blueberries, ½ cup sugar, and ¼ cup water. Bring it to a simmer over medium heat, giving it a stir now and then. Let it bubble away for 5-7 minutes – the berries will soften and get juicy. While that’s happening, whisk the 2 tablespoons cornstarch with the 2 tablespoons cold water in a small bowl until it’s smooth. Pour this slurry into the simmering berries, stirring constantly. Keep stirring for another minute or two as it bubbles – you’ll see it thicken up into a beautiful, glossy sauce. Magic! Take it off the heat and stir in that tablespoon of lemon juice. Let this cool down completely too. It gets even thicker as it cools.
Step 5: The Grand Finale: Chill & Serve!
Once the cheesecake itself is totally cool to the touch (give it a couple of hours on the counter), cover it loosely with plastic wrap (try not to let it stick to the top!) and finally slide it into the fridge. Let it chill for at least 4 hours, but honestly, overnight is where the real magic happens. The flavors get deeper, the texture gets perfect. When you’re ready to serve, carefully run a thin knife around the inside edge of the pan before you unclip and lift off the springform ring. Spoon that glorious, cooled blueberry topping all over the top. Grab your sharpest, longest knife, dip it in hot water and wipe it clean between every single cut for those bakery-perfect slices. Stand back, admire your work. You just made an epic blueberry cheesecake recipe!
Feeling Virtuous? Lighter Options
Look, this is an indulgent dessert, but if you want to lighten it up slightly without sacrificing too much joy:
- Cream Cheese Swap: You could replace one block of cream cheese with Neufchâtel (it’s naturally lower fat) or even thick Greek yogurt. Texture changes a bit, still yummy.
- Sugar Situation: Feel free to slightly reduce the sugar in the filling or topping. Taste the berries first!
- Crust Ideas: Whole wheat grahams add some fiber. A nut crust (almond flour!) is a neat gluten-free swap.
- Berry Power: Just let those blueberries shine! Maybe use a little less sugar in the topping and enjoy the natural sweetness.
Recipes You May Like
How to Serve This Bad Boy
It’s pretty stunning as-is, but if you want extra credit:
- Whipped Cream: Duh. A soft cloud of barely sweetened whipped cream is classic.
- Lemon Zest: A final sprinkle of bright yellow zest looks gorgeous and smells amazing.
- Mint: A little green sprig of mint always looks fancy.
- Warm & Cold: Try gently warming just the blueberry sauce before spooning it over the cold slice – amazing contrast!
- Keep it Simple: Honestly, just a fork is all you really need. This blueberry cheesecake recipe speaks for itself.
Keeping the Dream Alive (Storing Leftovers)
If, by some miracle, you have leftovers (what’s that?), here’s the storage scoop for your blueberry cheesecake recipe:
- Fridge is Your Friend: Pop leftovers into an airtight container and back into the fridge they go. They’ll be happy in there for 4-5 days. The crust might soften a tad, but still totally delicious.
- Freeze It? Yes! Best to freeze it before adding the topping. Once fully chilled, wrap the whole cheesecake (or individual slices) super well in plastic wrap, then foil. It’ll keep for a month or two. Thaw overnight in the fridge. Whip up the topping fresh before serving.
Seriously, Why I Adore This Recipe (And You Will Too!)
There’s just something incredibly satisfying about making this blueberry cheesecake recipe from scratch. It feels fancy, looks impressive, and tastes ridiculously good. It’s that perfect blend of tangy, creamy, sweet, and fruity with the buttery crunch of the crust. It’s become my go-to for birthdays, holidays, or just… a Tuesday when I need a pick-me-up.
So please, give it a whirl! Don’t be intimidated. Take it step-by-step, trust the process (especially the cooling parts!), and prepare for glory.
I genuinely want to know how it goes! Did you nail it? Did you swap anything out? Got questions? Tell me everything in the comments below! Happy baking, friends!

blueberry cheesecake recipe
Ultimate baked blueberry cheesecake recipe! Creamy homemade filling, tall graham cracker crust & vibrant blueberry topping. Perfect dessert - bake it now!
Ingredients
- 2 ½ cups graham cracker crumbs (from about 18-20 full sheets)
- ½ cup (1 stick / 113g) unsalted butter, melted nice and golden
- ⅓ cup (67g) granulated sugar
- Just a little pinch of salt
- 32 oz (four 8oz blocks / 904g) full-fat cream cheese, super important it's softened to room temp!
- 1 ¾ cups (350g) granulated sugar
- ¼ cup (30g) all-purpose flour OR 3 tablespoons cornstarch (your anti-crack helper!)
- 1 teaspoon pure vanilla extract (the good stuff!)
- ½ teaspoon lemon zest (optional, but lovely for brightness)
- 4 large eggs, also at room temperature (let 'em hang out with the cream cheese)
- ½ cup (120ml) heavy cream OR full-fat sour cream, at room temp too!
- 1 to 1½ cups fresh or frozen blueberries (optional, for swirling into the batter if you're feelin' fancy)
- 3 cups fresh or frozen blueberries (no need to thaw if frozen)
- ½ cup (100g) granulated sugar (or adjust to your berry sweetness)
- ¼ cup (60ml) water
- 2 tablespoons cornstarch
- 2 tablespoons COLD water (for the cornstarch slurry)
- 1 tablespoon fresh lemon juice
Instructions
Step 1: Build That Crust Foundation
First up, crank your oven to 350°F (175°C). Grab your 9-inch springform pan (the kind with the removable sides). No need to grease it. In a bowl, stir together the graham cracker crumbs, that ⅓ cup sugar, and the pinch of salt. Pour in your glorious melted butter and mix it all up until it looks like damp sand and smells amazing. Tip this mixture into the springform pan. Now, get pressing! Use your fingers or the bottom of a flat glass to pack the crumbs firmly onto the bottom and right up the sides. Aim for at least an inch, maybe an inch and a half high – that’s key for the look we’re after! Pop it in the oven for 10 minutes to set. Take it out and let it cool on a wire rack while you tackle the filling.
Step 2: Create the Creamiest Filling Ever
Alright, deep breaths. Remember: room temperature ingredients! Grab your biggest bowl and an electric mixer (handheld is fine, stand mixer with the paddle is great). Beat the softened cream cheese on medium speed until it’s totally smooth. No lumps allowed! Scrape down the bowl really well – lumps hide! Gradually pour in the 1 ¾ cups sugar and the flour (or cornstarch), mixing on low speed until it’s just combined. Seriously, stop mixing as soon as it comes together. Overmixing = tough cheesecake. Stir in the vanilla and lemon zest. Now for the eggs: add them one at a time, mixing on low speed just until the yellow disappears. Don’t go wild here! Too much air = cracks later. Lastly, gently fold in the room temp heavy cream or sour cream just until it’s blended. The batter should feel thick, smooth, and luxurious. Resist the urge to eat it all with a spoon (or don’t, I won’t tell).
Optional blueberry swirl moment: If you're feeling extra, you can fold in 1 to 1½ cups of fresh or frozen blueberries right into the batter before pouring it into the crust. Or go full drama with a few spoonfuls of blueberry sauce swirled through the filling using a butter knife. It looks fancy, tastes divine, and doubles the blueberry joy.
Step 3: Assemble, Bake, and Chill (Figuratively and Literally)
Gently pour that gorgeous filling into your waiting crust. Smooth the top with an offset spatula or the back of a spoon. Okay, baking time! Place the springform pan on a baking sheet (just in case!). Bake at 350°F (175°C) for 15 minutes. THEN – important step – turn the oven temp down to 250°F (120°C) and keep baking for about 55-60 minutes more. This gentle heat is key for creamy texture and preventing cracks. How do you know it’s done? The edges should look set, but the very center should still have a little wiggle when you gently nudge the pan. Not sloshy, just… jiggly. Perfect. Now, turn the oven OFF. Prop the oven door open a crack (use a wooden spoon handle!) and let the cheesecake cool down in the oven for 1 whole hour. Slow cooling = happy cheesecake. After that hour, bring it out and let it cool completely on a wire rack on your counter. No fridge yet!
Step 4: Whip Up That Brilliant Blueberry Topping
You can do this while the cheesecake cools, or even make it ahead. Grab a saucepan and toss in the blueberries, ½ cup sugar, and ¼ cup water. Bring it to a simmer over medium heat, giving it a stir now and then. Let it bubble away for 5-7 minutes – the berries will soften and get juicy. While that’s happening, whisk the 2 tablespoons cornstarch with the 2 tablespoons cold water in a small bowl until it’s smooth. Pour this slurry into the simmering berries, stirring constantly. Keep stirring for another minute or two as it bubbles – you’ll see it thicken up into a beautiful, glossy sauce. Magic! Take it off the heat and stir in that tablespoon of lemon juice. Let this cool down completely too. It gets even thicker as it cools.
Step 5: The Grand Finale: Chill & Serve!
Once the cheesecake itself is totally cool to the touch (give it a couple of hours on the counter), cover it loosely with plastic wrap (try not to let it stick to the top!) and finally slide it into the fridge. Let it chill for at least 4 hours, but honestly, overnight is where the real magic happens. The flavors get deeper, the texture gets perfect. When you’re ready to serve, carefully run a thin knife around the inside edge of the pan before you unclip and lift off the springform ring. Spoon that glorious, cooled blueberry topping all over the top. Grab your sharpest, longest knife, dip it in hot water and wipe it clean between every single cut for those bakery-perfect slices. Stand back, admire your work. You just made an epic blueberry cheesecake recipe!
Notes
Nutrition Information:
Yield: 10-12 servingsAmount Per Serving: Calories: Approximately 550 kcal per serving
Tried This Recipe? Share Your Thoughts!
There are no reviews yet. Be the first one to write one.