How I Ditched the Splatter Guard: My Oven-Baked Chicken Story
Alright, let’s be real. For the longest time, chicken cutlets in my house meant dodging hot oil splatters like a ninja. The kitchen smelled like a takeaway for hours, and no matter how careful I was, some bits ended up borderline burnt while others were… meh. Delicious, yes, but the effort and cleanup? A total vibe killer, especially on a Tuesday night!
I kept thinking, “There has to be a better way!” So, I started messing around with the oven. My mission: figure out baked chicken cutlet recipes that could give me that glorious crunch and juicy inside without the frying fiasco.
Let me tell you, there were some… interesting experiments. Some soggy, some dry, some where the breading just slid right off (whoops!). But after batch after batch (my family were troopers, bless ’em), I finally cracked the code. This method? It’s the one. It’s become my secret weapon for dinners that feel fancy but are secretly super simple. These baked chicken cutlet recipes changed my weeknight dinner game, and I bet they’ll change yours too!
What You’ll Need: The Lineup for Amazing Baked Cutlets
Ready to make some magic? The best part about these baked chicken cutlet recipes is how simple the ingredients are. You probably have most of this stuff already!
- Chicken Breasts (about 1.5 lbs, boneless & skinless): Look for 3 or 4 medium ones. Or cheat like I sometimes do and buy the “thin-cut” ones – saves you a step!
- Flour (about 1/2 cup): Just regular all-purpose works great. It’s like the primer coat for our crispy paint job! Need it GF? A gluten-free blend works just fine.
- Eggs (2 large): These guys are the glue holding our crunchy coating together. Give ’em a quick whisk.
- Breadcrumbs (about 1.5 cups): Here’s where the real crunch comes from!
- Panko: My absolute fave! They’re lighter and get unbelievably crispy and golden. Trust me on this.
- Regular Breadcrumbs: Totally fine too, they give a slightly denser coating. If they’re plain, remember to jazz them up with seasonings!
- Other ideas? Crushed cornflakes give a mega crunch, and GF breadcrumbs are easy to find these days.
- Parmesan Cheese (about 1/2 cup): Get the finely grated stuff. It melts into the breadcrumbs and adds this amazing salty, cheesy flavour bomb. Don’t skip this!
- The Spice Crew: This is where the flavour lives!
- Salt (1 tsp, or to your taste): Can’t live without it.
- Black Pepper (1/2 tsp): Freshly ground makes a difference!
- Garlic Powder (1 tsp): Because… garlic. Enough said.
- Onion Powder (1/2 tsp): Adds that nice savoury background note.
- Paprika (1 tsp): I love smoked paprika for a bit of warmth, but sweet works great too. Adds lovely colour!
- (Optional but awesome) Dried Italian Herbs (1 tsp): A little oregano or an Italian blend adds that classic cutlet vibe.
- Olive Oil (or Avocado Oil): Just a drizzle or a spray. This helps get everything golden and crisp without needing a vat of oil. A spray bottle makes this super easy!
Let’s Talk Time: Quicker Than You Think!
Okay, how long is this actually going to take? Because let’s face it, time is precious!
- Getting Ready (Prep): Maybe 15-20 minutes? This is for slicing/pounding the chicken (if you need to) and setting up your little breading station. Pour yourself a drink while you do it!
- Oven Time (Cook): About 20-25 minutes. Just enough time to toss a quick salad or get the table set.
- Total Time: We’re looking at around 35-45 minutes, tops.
Seriously, that’s fast for something this delicious! Think about it – less time than delivery often takes, and way more satisfying. It feels like a total win when you pull these gorgeous baked chicken cutlet recipes out of the oven knowing dinner is done and it wasn’t a huge ordeal.
Making the Magic Happen: Step-by-Step
Alright, team, let’s cook! It’s easier than you think.
Step 1: Get That Chicken Ready
If your chicken breasts are thick, carefully slice them in half horizontally to make thinner cutlets (aim for about 1/2 inch). Pop ’em between parchment paper or plastic wrap and give them a gentle pounding with a mallet, rolling pin, or even a sturdy can. Get them nice and even, about 1/4 inch thick – this is KEY for quick, even cooking! Then, pat them totally dry with paper towels. Like, really dry. This helps that yummy breading stick like glue.
Step 2: Set Up Your Breading Zone
Okay, assembly line time! It makes the process way less messy. Grab three shallow plates or bowls:
- Plate 1: Flour + a pinch of salt & pepper. Give it a little mix.
- Plate 2: Crack in the eggs, add a splash of water (maybe a tablespoon?), and beat ’em lightly with a fork.
- Plate 3: Dump in your breadcrumbs (Panko! Panko!), Parmesan, salt, pepper, garlic powder, onion powder, paprika, and any herbs you’re using. Mix this all up really well – this is where all the flavour hangs out for our baked chicken cutlet recipes.
Step 3: Dip, Dip, Press!
Let’s get these cutlets coated. Take one piece of chicken at a time:
- Give it a light coat in the flour, then shake off the extra. Don’t want it clumpy!
- Dip it into the egg wash, making sure it’s all covered. Let the excess drip back into the bowl for a second.
- Now, lay it in the breadcrumb mix. Press it down gently but firmly on both sides. Really encourage those crumbs to stick! Place the beautifully breaded cutlet on a wire rack sitting inside a baking sheet. Why the rack? Airflow! It helps the bottom get crispy too. If you don’t have one, parchment paper on the baking sheet is fine. Repeat till all the chicken is looking fabulous.
Step 4: Oven Time!
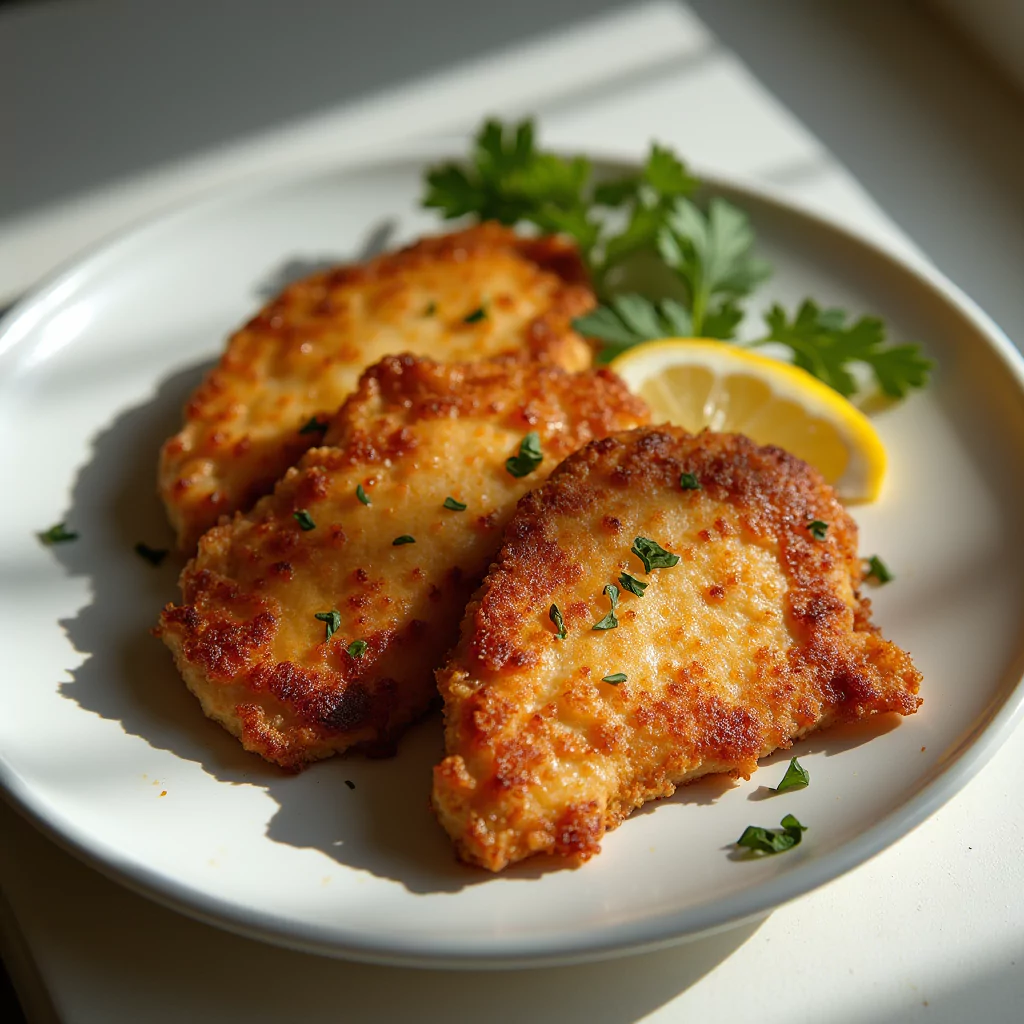
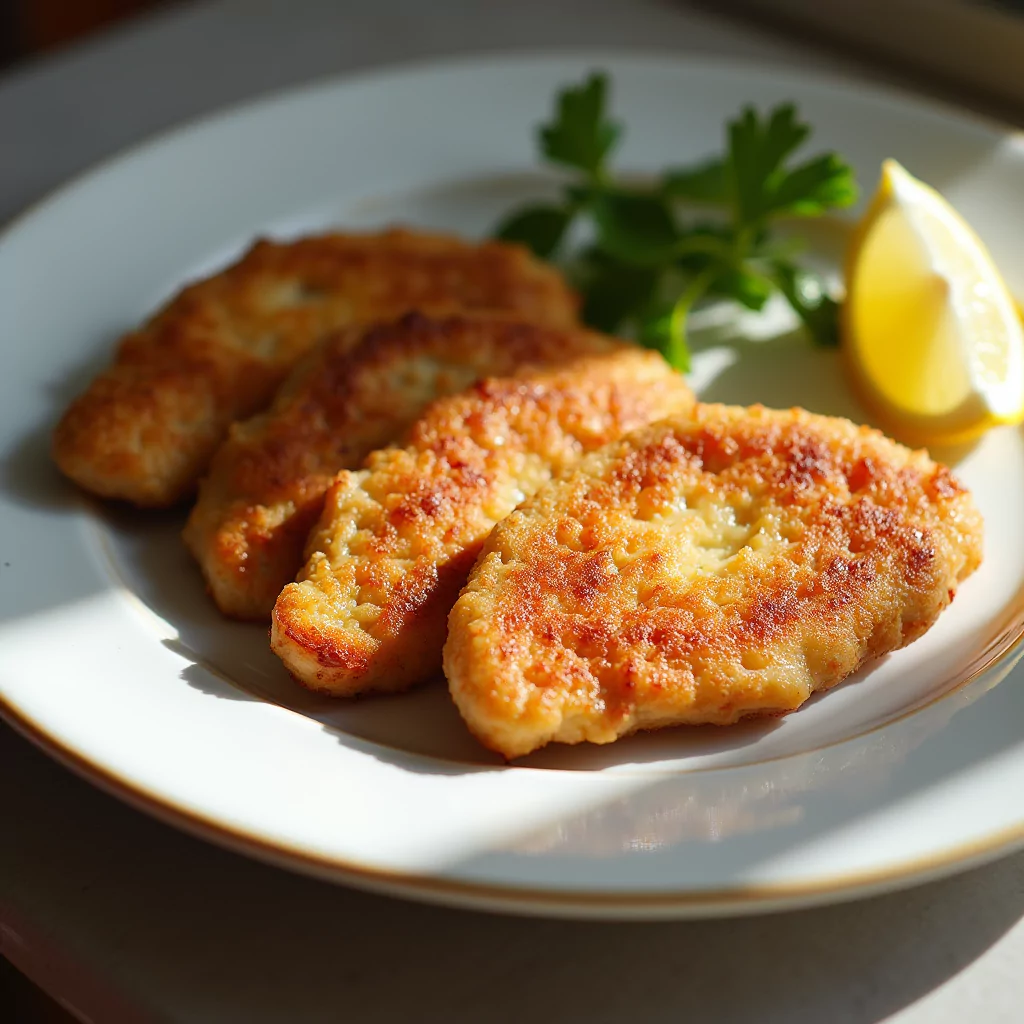
Crank your oven up to 400°F (200°C). Arrange your breaded cutlets on the baking sheet (with the rack, ideally!) making sure they have a little breathing room – don’t overcrowd the pan! Give the tops a light drizzle of olive oil or a good spritz with cooking spray. Pop ’em in the oven for 20-25 minutes. Flip them carefully about halfway through. They’re done when they’re gorgeously golden brown, crispy, and cooked through (a meat thermometer should read 165°F / 74°C).
Feeling Virtuous? Lighter Takes on Cutlets
Want the deliciousness but maybe a tad lighter? These baked chicken cutlet recipes are easy to tweak!
- Go Grainy: Use whole wheat breadcrumbs or whole wheat Panko. Adds a little nutty flavour and extra fiber.
- Spray, Don’t Pour: An oil mister or spray bottle is your friend here for controlling the fat. Just a light coating does the trick.
- Air Fryer Power: If you have an air fryer, these are amazing in it. Follow the breading steps, give them a light spray, and cook around 375°F (190°C) for maybe 12-15 minutes, flipping once. Keep an eye on them!
- Flavour Boost: Double down on herbs and spices! A big squeeze of fresh lemon juice right before serving adds brightness without needing heavy sauces.
- Easy GF: Use your favourite gluten-free flour blend and GF breadcrumbs. Works like a charm!
Let’s Eat! Awesome Ways to Serve ‘Em Up
The best part! Your kitchen smells amazing and you’ve got these perfect, crispy baked chicken cutlet recipes ready to go. How to serve them? let me count the ways…
- The Classic: You can’t go wrong with some creamy mashed potatoes (or cauliflower mash for a lighter vibe) and a simple green veggie like roasted broccoli or asparagus. Maybe a little lemon wedge on the side. Chef’s kiss.
- Speedy Parm: Spoon over some warm marinara sauce, top with a slice of mozzarella, and pop back in the oven (or under the broiler) for a minute until melty. Serve over pasta or zoodles. Instant Chicken Parm satisfaction
- Salad Star: Slice ’em up and toss them onto a big salad. Seriously good on a Caesar, or just mixed greens with a zippy vinaigrette. Makes lunch feel exciting!
- Killer Sandwich: Oh yeah, tuck one of these bad boys into a toasted bun with lettuce, tomato, maybe some pickles and a slather of spicy mayo or pesto aioli. Best chicken sandwich ever.
- Bowl Goals: Build a yummy bowl with quinoa or rice, roasted veggies (sweet potatoes are great!), maybe some black beans and corn and avocado and top with sliced chicken. Drizzle with your fave dressing.
- Kid Heaven: Slice into strips (before or after cooking) for the ultimate chicken tenders. Serve with ketchup or honey mustard for dipping. Happy kids guaranteed.
Saving Leftovers (If You Have Any!)
Okay, maybe you made a big batch, or maybe you have superhuman self-control. Here’s how to store your leftover baked chicken cutlet recipes so they don’t turn sad and soggy:
- Chill Out: Let them cool down completely on the counter first. Putting hot stuff in the fridge = condensation = soggy breading. No thanks!
- Box ‘Em Up: Store in an airtight container in the fridge. They’ll be good for 3, maybe 4 days.
- Reheat Right: The secret to bringing back the crisp? Oven or air fryer! A few minutes at around 350°F (175°C) should do it. Please, please avoid the microwave unless you absolutely have to – it steams them and ruins the crunch!
- Freeze for Later: You can totally freeze these before baking! Bread them as usual, lay them flat on a baking sheet, and freeze until solid. Then toss them in a freezer bag (parchment paper between layers helps prevent sticking). Bake straight from frozen, just add 10-15 extra minutes to the cook time. Future you will thank you!
Okay, I’m Obsessed. Here’s Why You Will Be Too!
I know I’ve been raving, but seriously, what’s not to adore about these baked chicken cutlet recipes? They are:
- Easy Peasy: Minimal stress, maximum deliciousness. Perfect for weeknights.
- Crunchy & Juicy: They nail that texture combo we all crave.
- Healthier-ish: All the satisfaction of fried chicken, but baked!
- Super Versatile: Eat them plain, on pasta, in salads, in sandwiches… endless possibilities!
It’s one of those recipes that just works. It makes you feel like you’ve got this cooking thing down, even if you were feeling totally overwhelmed ten minutes before starting.
Alright, your turn! I really hope you give these a go. They’re a staple for a reason! Tell me how they turn out for you in the comments below. Did you add any secret ingredients? Have a genius serving idea? I genuinely love hearing from you guys! Happy cooking!
Recipes You May Like

Baked Chicken Cutlet Recipes
The best easy baked chicken cutlet recipes! Get perfectly crispy, juicy, oven-baked chicken every time. Simple & delicious. Try this method!
Ingredients
- Around 1.5 lbs boneless skinless chicken breasts (about 3-4 medium ones)
- Roughly 1/2 cup all-purpose flour (or a gluten-free blend)
- 2 large eggs
- Around 1.5 cups Panko breadcrumbs (highly recommended for crunch!) or regular breadcrumbs
- About 1/2 cup grated Parmesan cheese (the finer, the better)
- 1 teaspoon salt (adjust to your taste)
- 1/2 teaspoon black pepper (freshly ground if you have it!)
- 1 teaspoon garlic powder
- 1/2 teaspoon onion powder
- 1 teaspoon paprika (sweet or smoked both work great)
- Optional: 1 teaspoon dried Italian seasoning or mixed herbs
- Olive oil or avocado oil (for drizzling or spraying)
Instructions
Step 1: Get That Chicken Ready
If your chicken breasts are thick, carefully slice them in half horizontally to make thinner cutlets (aim for about 1/2 inch). Pop ’em between parchment paper or plastic wrap and give them a gentle pounding with a mallet, rolling pin, or even a sturdy can. Get them nice and even, about 1/4 inch thick – this is KEY for quick, even cooking! Then, pat them totally dry with paper towels. Like, really dry. This helps that yummy breading stick like glue.
Step 2: Set Up Your Breading Zone
Okay, assembly line time! It makes the process way less messy. Grab three shallow plates or bowls:
- Plate 1: Flour + a pinch of salt & pepper. Give it a little mix.
- Plate 2: Crack in the eggs, add a splash of water (maybe a tablespoon?), and beat ’em lightly with a fork.
- Plate 3: Dump in your breadcrumbs (Panko! Panko!), Parmesan, salt, pepper, garlic powder, onion powder, paprika, and any herbs you’re using. Mix this all up really well – this is where all the flavour hangs out for our baked chicken cutlet recipes.
Step 3: Dip, Dip, Press!
Let’s get these cutlets coated. Take one piece of chicken at a time:
- Give it a light coat in the flour, then shake off the extra. Don’t want it clumpy!
- Dip it into the egg wash, making sure it’s all covered. Let the excess drip back into the bowl for a second.
- Now, lay it in the breadcrumb mix. Press it down gently but firmly on both sides. Really encourage those crumbs to stick! Place the beautifully breaded cutlet on a wire rack sitting inside a baking sheet. Why the rack? Airflow! It helps the bottom get crispy too. If you don’t have one, parchment paper on the baking sheet is fine. Repeat till all the chicken is looking fabulous.
Step 4: Oven Time!
Crank your oven up to 400°F (200°C). Arrange your breaded cutlets on the baking sheet (with the rack, ideally!) making sure they have a little breathing room – don’t overcrowd the pan! Give the tops a light drizzle of olive oil or a good spritz with cooking spray. Pop ’em in the oven for 20-25 minutes. Flip them carefully about halfway through. They’re done when they’re gorgeously golden brown, crispy, and cooked through (a meat thermometer should read 165°F / 74°C).
Notes
Nutrition Information:
Yield: 4 servingsAmount Per Serving:Calories: Approximately 350-400 calories per cutlet
There are no reviews yet. Be the first one to write one.