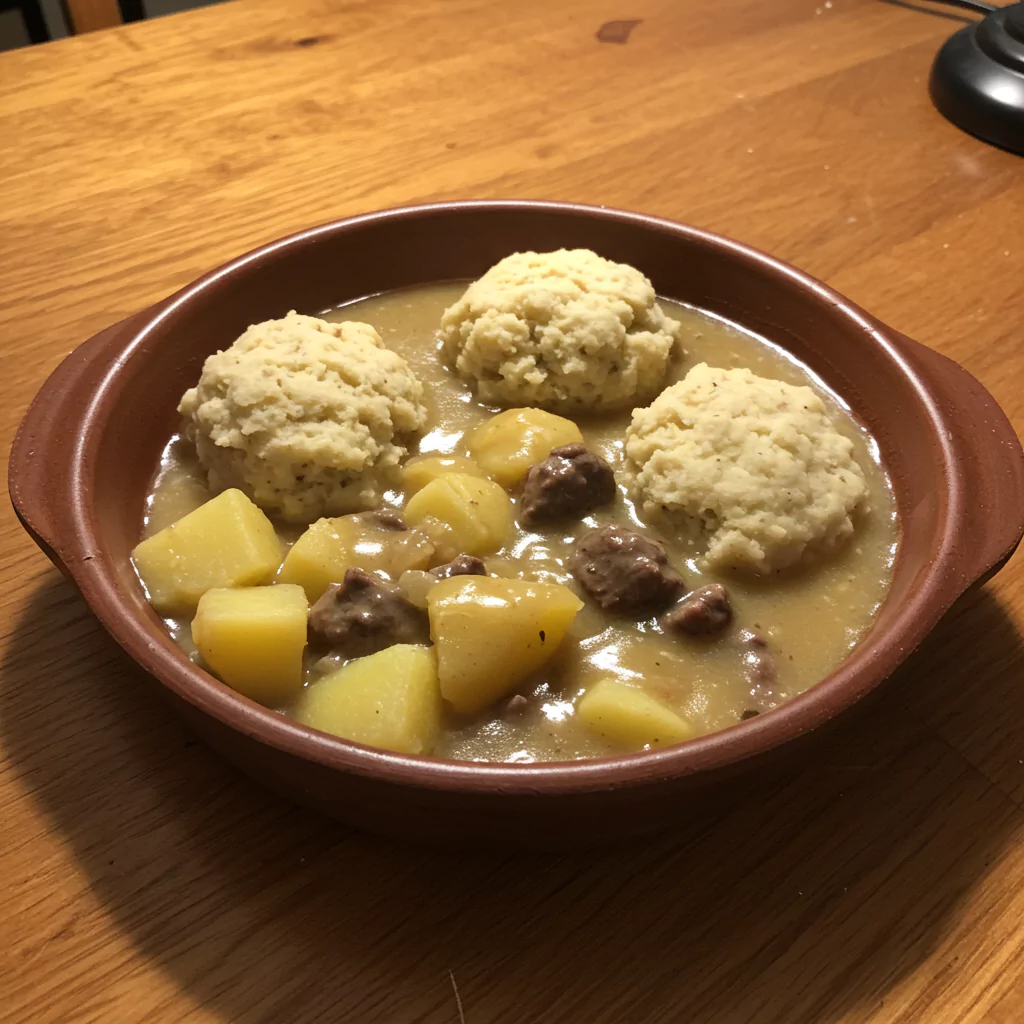
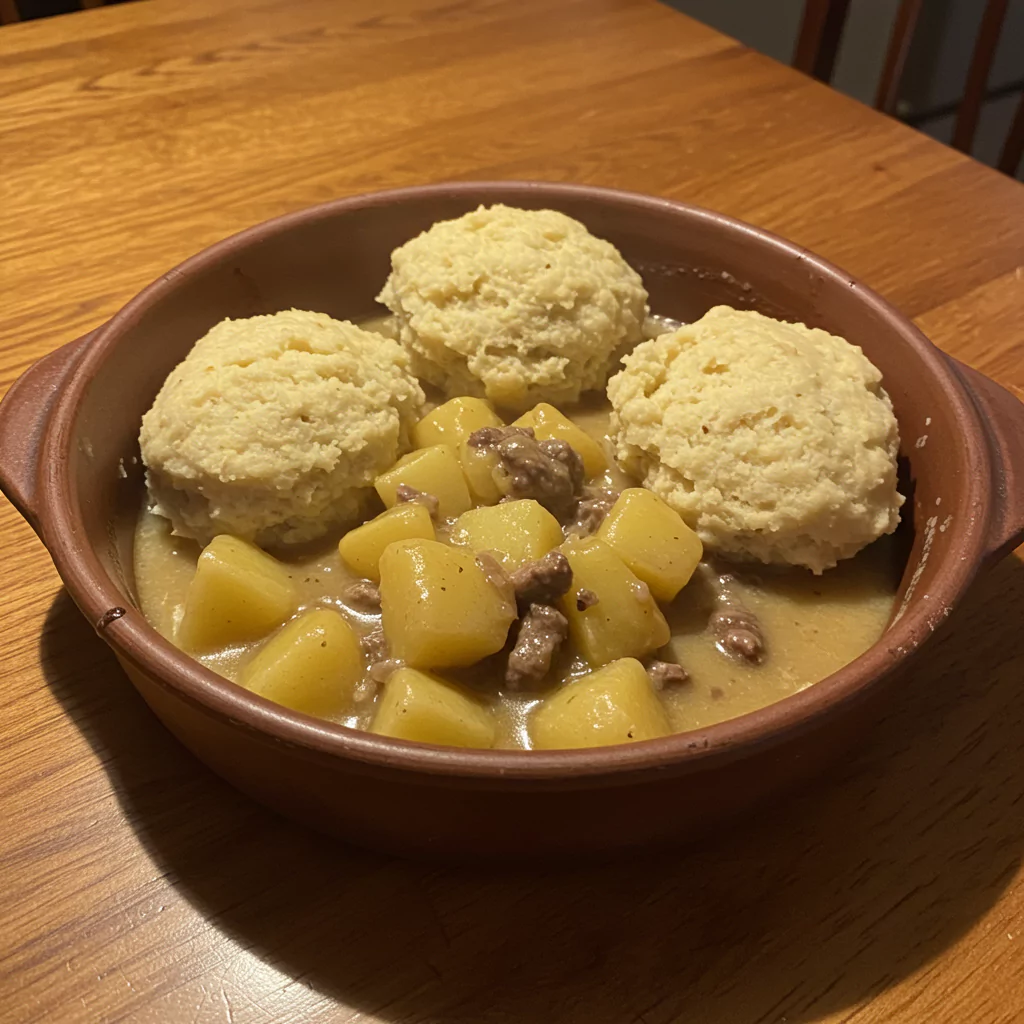
Hey everyone! So, let me tell you about this dish. It’s one of those recipes that just feels like home, you know? I first threw together something like this years ago on the gloomiest rainy day imaginable. Nothing else sounded good, and I just needed pure, stick-to-your-ribs comfort. It took a while to get it just right – especially those dumplings! Oh man, the first few batches were… let’s just say ‘learning experiences’. But now? This chipped beef flour dumplings potatoes recipe is my go-to when life calls for something seriously comforting. It’s this amazing mix of salty, creamy beef gravy, those soft, doughy dumplings that just drink up the sauce, and tender potatoes making it a full-on meal. Best part? It’s easy, uses stuff you probably have lying around, and tastes like pure nostalgia.
Ingredients You’ll Need for Chipped Beef Flour Dumplings Potatoes
Alright, let’s round up the gang for this flavor party! No need to hunt down anything weird or fancy – promise. Here’s what you’ll need to grab to make your own amazing chipped beef flour dumplings potatoes:
For the Creamy Beef & Potato Goodness:
- Dried Beef (about 4-5 oz): You know, the stuff in the little glass jar or plastic pouch? Usually hanging out near the tuna fish. It’s salty and super beefy – that’s our main flavor punch! If you’re stuck: Super thinly sliced roast beef from the deli could work, but you’ll definitely need to add more salt yourself. It won’t be quite the same, but it’s an option!
- Butter (4 tablespoons): I usually grab unsalted so I can control the salt, especially since that dried beef packs a punch. No butter? Margarine works, or even a plain oil like canola.
- All-Purpose Flour (4 tablespoons): Just regular flour. This is what makes our sauce thick and luscious.
- Milk (3 cups): Whole milk makes it dreamy-creamy, but honestly, 2% is totally fine too. Need dairy-free? Unsweetened almond or soy milk can step in, just know the taste might be a little different. Still good though!
- Potatoes (about 1.5 lbs – maybe 3 or 4 medium ones): Yukon Golds are my fave because they get so creamy, but Russets work great too. Peel ’em and chop ’em into cubes about the size of your thumb tip. They cook right in the gravy!
- Black Pepper (to taste): Freshly cracked makes a world of difference, trust me.
- Onion Powder & Garlic Powder (Optional, like 1/2 tsp each): I always add these. They just round everything out nicely.
- Fresh Parsley (Optional, for sprinkling): Makes it look pretty and adds a little fresh zing at the end. Totally optional, but nice!
For Those Fluffy Little Dumplings:
- All-Purpose Flour (1.5 cups): Again, just the regular stuff.
- Baking Powder (2 teaspoons): This is what makes ’em puff up! Check the date – old baking powder is sad baking powder.
- Salt (1/2 teaspoon): Just a little bit for flavor.
- Milk (3/4 cup): Same deal as above – whole or 2% is great. Dairy-free works here too.
- Melted Butter or Oil (2 tablespoons, optional but hey, why not?): This just makes the dumplings extra tender and yummy. I usually add it.
Timing: How Long ‘Til We Eat?
Okay, let’s talk reality – how long does this actually take?
- Getting Ready (Prep): Give yourself about 20 minutes. This is for rinsing the beef (don’t skip this!), chopping the spuds, and getting all your bits and pieces measured out. It’s actually kind of a relaxing little ritual.
- Cooking Time (The Fun Part): Plan on about 40-50 minutes on the stove. You’re making the sauce, letting the potatoes get tender, and then steaming those glorious dumplings right on top.
- Total Time: So, you’re looking at roughly 60-70 minutes, start to finish. Just over an hour for a meal this hearty and satisfying? I’ll take it! It feels faster than waiting for a slow cooker, but gives you all those cozy vibes.
Step-by-Step: Let’s Make Some Magic!
Ready to dive in? Awesome! Just follow along, and soon you’ll be dishing up your very own chipped beef flour dumplings potatoes.
Step 1: Beef and Potato Prep!
First up, that dried beef. Pop open the jar or package and give the slices a good rinse under cold running water. Seriously, this helps wash off some of the super-intense saltiness. Pat it dry with paper towels, then give it a rough chop or just tear it into pieces you’d want to eat in one bite. Set that aside. Now, tackle the potatoes. Peel ’em and chop ’em into roughly 1-inch cubes. If you’re prepping slightly ahead, you can pop the cubed potatoes into a bowl of cold water so they don’t turn brown and weird.
Step 2: Making the Sauce Base (aka Roux!)
Grab a big pot or a Dutch oven – something with a lid that fits well, you’ll need it later! Melt those 4 tablespoons of butter over medium heat. Once it’s melted and starting to bubble a bit, sprinkle in the 4 tablespoons of flour. Start whisking right away! Keep whisking for about a minute or two. You’re basically toasting the flour a little, which gets rid of that raw taste and makes your sauce smooth. We’re not aiming for dark brown here, just a nice, pale golden color.
Step 3: Go Slow with the Milk
Okay, now slowly, slowly start pouring in the 3 cups of milk while you keep whisking like crazy. Adding it bit by bit is the secret to keeping lumps away. Keep whisking until it’s all in there and the mixture looks smooth. Bring it up to a gentle simmer (little bubbles around the edges), whisking often so it doesn’t stick. You’ll see it start to thicken up nicely – usually takes about 5-7 minutes. Now’s the time to stir in the onion and garlic powder if you’re using them, plus a good few grinds of black pepper. Don’t add any extra salt yet – wait ’til the end!
Step 4: Add the Good Stuff
Time to invite the main players to the party! Gently stir in your rinsed and chopped dried beef and those cubed potatoes. Stir it all up so everything gets coated in that yummy, creamy sauce. Let it come back to a gentle simmer.
Step 5: Let it Mingle (Simmer Time!)
Turn the heat down to low, slap that lid on tightly, and let it bubble away gently for about 20-25 minutes. You want those potatoes to get nice and tender – test one with a fork! Give it a stir every now and then just to make sure nothing’s sticking to the bottom of the pot. The smell starting to fill your kitchen? Yeah, that’s the good stuff. This simmering is where the magic happens for your chipped beef flour dumplings potatoes.
Step 6: Whip Up the Dumpling Dough
While that’s simmering, let’s make the dumplings. Grab a medium bowl and whisk together the 1.5 cups flour, 2 teaspoons baking powder, and 1/2 teaspoon salt. Pour in the 3/4 cup milk and the optional melted butter or oil. Now, stir it just until everything is combined. Seriously, stop stirring as soon as you don’t see dry flour. If you mix it too much, the dumplings get tough, and we want fluffy clouds! A few lumps are totally fine, even good.
Step 7: Drop ‘Em Like They’re Hot (But Gently!)
Check that your beef and potato mixture is simmering nicely (gentle bubbles, not a rolling boil). Now, using two spoons (one to scoop, one to nudge it off), drop blobs of the dumpling dough right on top of the simmering gravy. Try to make them roughly the same size and leave a little space between them because they’re gonna puff up. Once all the dough is in there, put the lid back on TIGHT. And here’s the crucial part: DO NOT PEEK for 15 minutes! Resist the urge! They need that trapped steam to cook properly. Lifting the lid lets the magic escape.
Step 8: The Big Reveal!
Okay, 15 minutes are up! Carefully lift the lid (watch out for steam!). The dumplings should look puffy and feel cooked through. If you’re unsure, poke one in the middle with a toothpick – it should come out clean. Give everything a gentle stir (it’s okay if the dumplings break up a little). Now, taste the sauce. Need more pepper? Maybe a tiny pinch of salt? Adjust it to your liking. And that’s it! Your amazing, homemade chipped beef flour dumplings potatoes are ready to be devoured! Ladle it up high in bowls, maybe sprinkle some parsley on top, and enjoy!
Lighter Twists on This Cozy Classic
Feeling the comfort food craving but want to keep it a little lighter? Totally doable! Here are some things I’ve tried:
- Slimmer Sauce: Swap the whole milk for 2% or even 1%. You can also shave off a tablespoon of butter when you start the sauce. Still creamy, just a little less rich.
- Veggie Power-Up: Toss in some frozen peas and carrots during the last 10 minutes the potatoes are simmering. Or, sauté some finely chopped celery and onions before you add the flour for the roux. Adds flavor and goodness!
- Whole Wheat Clouds: Try using half whole wheat flour and half all-purpose for the dumplings. They’ll be a bit heartier and nuttier. You might need just a splash more milk, as whole wheat tends to be thirstier.
- Salt Smarts: Really give that dried beef a good rinse! Finding low-sodium versions is like finding a unicorn, so rinsing is key. Use pepper, herbs, and those optional garlic/onion powders to build flavor instead of reaching for the salt shaker right away.
- Carb Swap: If you’re watching carbs, you could make the creamy chipped beef part (maybe add extra veggies like mushrooms or peas) and serve it over steamed cauliflower instead of cooking the potatoes in it and skipping the dumplings. It’s a different vibe, but still really comforting!
How to Serve Up Maximum Happiness
Honestly, this chipped beef flour dumplings potatoes is pretty darn perfect straight out of the pot and into a bowl. But hey, options are always nice!
- The Classic: Just spoon it into a nice shallow bowl. Simple, perfect. Done.
- Toast Points: Okay, this is SO good. Ladle it over thick slices of toasted bread – sourdough is amazing, but even good ol’ white bread works. The toast gets all soft and wonderful soaking up that gravy. Mmm.
- Salad on the Side: A simple green salad with a zippy vinaigrette dressing is awesome next to this. The freshness cuts through the richness in the best way.
- Pepper Power: I always finish my bowl with a few extra cranks of black pepper. A little chopped fresh parsley looks great too. Feeling spicy? A dash of your favorite hot sauce wouldn’t be wrong!
- Full Spread: It’s definitely a meal on its own, but if you want to round it out, some simple steamed green beans or buttered corn on the side are never a bad idea, especially if you’re feeding hungry folks who love their chipped beef flour dumplings potatoes.
Storing Tips: Keeping the Goodness Going
Got leftovers of your chipped beef flour dumplings potatoes? High five! Here’s the best way to handle them:
- In the Fridge: Let it cool down completely first (important!), then scoop it into an airtight container. It’ll happily hang out in the fridge for 3, maybe 4 days.
- Reheating: That sauce will get pretty thick when it’s cold. The best way to reheat is gently on the stove over low heat. Add a splash of milk or even water to help loosen it up as it warms. Stir it often so it doesn’t stick or scorch. You can also zap individual servings in the microwave – just stop and stir partway through.
- Dumpling Update: Just so you know, the dumplings might be a little denser the next day after reheating, but they’re still totally delicious!
- To Freeze or Not to Freeze: Honestly, I usually don’t freeze this one. Creamy sauces can sometimes get a bit weird and separate when thawed, and the potatoes and dumplings aren’t always thrilled about being frozen either. Best to enjoy it fresh or within a few days from the fridge.
- Little Prep Shortcuts: Want to make weeknight dinner easier? You can totally peel and chop the potatoes earlier in the day – just keep ’em covered in cold water in the fridge. Rinsing and chopping the beef ahead works too. Store it in a container in the fridge. Little things like that make throwing together your chipped beef flour dumplings potatoes feel even faster!
Okay, Why Am I So Obsessed With This?
Look, there are fancier meals out there. There are quicker meals. But there’s just something about this dish. It’s not trying to be anything it’s not. It’s just honest-to-goodness comfort food that tastes like someone cared when they made it. Maybe it’s the creamy, salty gravy that coats every single bite, or the tender potatoes, or those soft, slightly chewy dumplings that are basically little sauce sponges… whatever it is, it just works.
Making chipped beef flour dumplings potatoes feels good too. It’s simple stirring and simmering, nothing complicated. And the smell that fills the house while it’s cooking? Pure cozy. Plus, seeing happy faces around the table ready to dig in? That’s pretty much the best feeling ever.
You really should give this a try, especially if you need a little edible comfort in your life. It’s like a warm blanket for your insides.
Now, I really want to know! Did you make it? Did you change anything? Add peas? Use a different kind of potato? Tell me everything in the comments below! I love hearing how recipes turn out in your kitchens! Happy cooking, friends!
Recipes You May Like

Chipped Beef Flour Dumplings Potatoes
Creamy chipped beef flour dumplings potatoes! An easy, hearty comfort food recipe with savory gravy & fluffy dumplings. Perfect dinner! Try it!
Ingredients
- Dried Beef (about 4-5 oz jar/package), rinsed well and chopped/torn
- Butter (4 tablespoons)
- All-Purpose Flour (4 tablespoons)
- Milk (3 cups - whole or 2% recommended)
- Potatoes (about 1.5 lbs, like 3-4 medium Yukon Golds or Russets), peeled and cubed (1-inch)
- Black Pepper (to your taste)
- Optional: Onion powder (1/2 tsp)
- Optional: Garlic powder (1/2 tsp)
- Optional: Fresh Parsley, chopped (for garnish)
- All-Purpose Flour (1.5 cups)
- Baking Powder (2 teaspoons - make sure it's fresh!)
- Salt (1/2 teaspoon)
- Milk (3/4 cup)
- Optional but nice: Melted Butter or Oil (2 tablespoons)
Instructions
Step 1: Beef and Potato Prep!
First up, that dried beef. Pop open the jar or package and give the slices a good rinse under cold running water. Seriously, this helps wash off some of the super-intense saltiness. Pat it dry with paper towels, then give it a rough chop or just tear it into pieces you’d want to eat in one bite. Set that aside. Now, tackle the potatoes. Peel ’em and chop ’em into roughly 1-inch cubes. If you’re prepping slightly ahead, you can pop the cubed potatoes into a bowl of cold water so they don’t turn brown and weird.
Step 2: Making the Sauce Base (aka Roux!)
Grab a big pot or a Dutch oven – something with a lid that fits well, you’ll need it later! Melt those 4 tablespoons of butter over medium heat. Once it’s melted and starting to bubble a bit, sprinkle in the 4 tablespoons of flour. Start whisking right away! Keep whisking for about a minute or two. You’re basically toasting the flour a little, which gets rid of that raw taste and makes your sauce smooth. We’re not aiming for dark brown here, just a nice, pale golden color.
Step 3: Go Slow with the Milk
Okay, now slowly, slowly start pouring in the 3 cups of milk while you keep whisking like crazy. Adding it bit by bit is the secret to keeping lumps away. Keep whisking until it’s all in there and the mixture looks smooth. Bring it up to a gentle simmer (little bubbles around the edges), whisking often so it doesn’t stick. You’ll see it start to thicken up nicely – usually takes about 5-7 minutes. Now’s the time to stir in the onion and garlic powder if you’re using them, plus a good few grinds of black pepper. Don’t add any extra salt yet – wait ’til the end!
Step 4: Add the Good Stuff
Time to invite the main players to the party! Gently stir in your rinsed and chopped dried beef and those cubed potatoes. Stir it all up so everything gets coated in that yummy, creamy sauce. Let it come back to a gentle simmer.
Step 5: Let it Mingle (Simmer Time!)
Turn the heat down to low, slap that lid on tightly, and let it bubble away gently for about 20-25 minutes. You want those potatoes to get nice and tender – test one with a fork! Give it a stir every now and then just to make sure nothing’s sticking to the bottom of the pot. The smell starting to fill your kitchen? Yeah, that’s the good stuff. This simmering is where the magic happens for your chipped beef flour dumplings potatoes.
Step 6: Whip Up the Dumpling Dough
While that’s simmering, let’s make the dumplings. Grab a medium bowl and whisk together the 1.5 cups flour, 2 teaspoons baking powder, and 1/2 teaspoon salt. Pour in the 3/4 cup milk and the optional melted butter or oil. Now, stir it just until everything is combined. Seriously, stop stirring as soon as you don’t see dry flour. If you mix it too much, the dumplings get tough, and we want fluffy clouds! A few lumps are totally fine, even good.
Step 7: Drop ‘Em Like They’re Hot (But Gently!)
Check that your beef and potato mixture is simmering nicely (gentle bubbles, not a rolling boil). Now, using two spoons (one to scoop, one to nudge it off), drop blobs of the dumpling dough right on top of the simmering gravy. Try to make them roughly the same size and leave a little space between them because they’re gonna puff up. Once all the dough is in there, put the lid back on TIGHT. And here’s the crucial part: DO NOT PEEK for 15 minutes! Resist the urge! They need that trapped steam to cook properly. Lifting the lid lets the magic escape.
Step 8: The Big Reveal!
Okay, 15 minutes are up! Carefully lift the lid (watch out for steam!). The dumplings should look puffy and feel cooked through. If you’re unsure, poke one in the middle with a toothpick – it should come out clean. Give everything a gentle stir (it’s okay if the dumplings break up a little). Now, taste the sauce. Need more pepper? Maybe a tiny pinch of salt? Adjust it to your liking. And that’s it! Your amazing, homemade chipped beef flour dumplings potatoes are ready to be devoured! Ladle it up high in bowls, maybe sprinkle some parsley on top, and enjoy!
Notes
Nutrition Information:
Yield: 4-6 servingsAmount Per Serving:Calories: Approximately 600-800 calories per serving
There are no reviews yet. Be the first one to write one.