Right pull up a chair and grab a cup of something cozy, because we need to have a serious heart-to-heart about French cheesecake. I know I know, another cheesecake recipe? But stick with me here, this one’s different.
Picture this: years ago I’m wandering around Paris, feeling wonderfully lost and slightly overwhelmed by all the beauty, and I stumble into this teeny-tiny little shop, barely bigger than my kitchen. And there it was. A slice of cheesecake that wasn’t like anything I’d ever had. It wasn’t heavy, it wasn’t cloying. It was… like a cloud. Creamy, tangy, light as air. It basically imprinted itself on my soul.
So naturally, I came home feeling haunted. Mission: Recreate The Cloud Cake. Oh, the cheesecakes that followed! Some were edible disasters, some were just… fine. My poor family became unwilling (okay, maybe willing) guinea pigs. There were cracks deep enough to lose a fork in, fillings that stubbornly refused to set, and yes, one very dramatic incident involving slippery hands and a springform pan meeting the floor (we don’t talk about that one). But after what felt like a million tries, tweaking this, adding that, whispering sweet nothings to my oven… I finally got it. That elusive, dreamy, authentic French cheesecake. It’s that little slice of Parisian magic, and honestly, every time I make it now, I feel ridiculously proud. Wanna feel proud too? Let’s bake!
The Loot: What You Need for This French Cheesecake Dream
Okay, ingredient time! Think of this as gathering your magical components. Good stuff matters, but honestly, don’t stress if you need to swap things around a bit. This French cheesecake is pretty forgiving.
For the Base That Holds It All Together:
- Digestive Biscuits: About 200g worth (that’s like 1.5 cups after you’ve had fun crushing ’em). They’ve got that lovely slightly salty, wheaty thing going on. Perfect.
- Can’t find ’em? No worries! Graham crackers are your classic go-to. Or! If you see those Biscoff cookies (Speculoos)? Grab ’em! They make a crust that tastes like caramel heaven. Seriously, try it sometime.
- Unsalted Butter: Melt down 100g (about 7 tablespoons). Get it nice and golden. The smell alone is worth it.
- Sugar: Just 2 tablespoons of the regular granulated stuff. Honestly, sometimes I even forget this, and it’s still amazing. Taste your biscuit crumbs first!
For the Cloud-Like Filling (The Main Event!):
- Cream Cheese: Here’s the star! 600g (around 2.5 blocks). And please, please, for the love of all things creamy, use the full-fat kind. And let it sit on your counter for a good while until it’s properly soft. I cannot stress this enough. Cold cream cheese = lumpy cheesecake = sad baker. We don’t want sad bakers! If you stumble upon Neufchâtel cheese (it’s softer, tangier), use that! It’s the OG French choice. But honestly, regular cream cheese works like a dream.
- Granulated Sugar: About 200g (roughly 1 cup). You know your sweet tooth better than I do – adjust slightly if needed!
- Large Eggs: Three of ’em. Let these guys chill out on the counter with the cream cheese. Room temp ingredients are buddies; they mix together so much better. Think of it as letting them get acquainted before the big party in the bowl.
- Sour Cream or Crème Fraîche: You need 200g (about 1 cup), full-fat again, and yes, room temp too! This brings the tang, the richness, the je ne sais quoi. Crème fraîche is divinely French, but good old sour cream is a fantastic stand-in and usually easier to find.
- Vanilla Extract: A good splash – 1.5 teaspoons. Use the real stuff if you possibly can; it makes such a difference compared to the imitation flavour.
- Lemon Zest: Zest from 1 whole medium lemon. Don’t you dare skip this! It’s not about making it taste lemony, it’s about adding this incredible brightness that lifts the whole French cheesecake and makes it sing. Trust.
- All-Purpose Flour: Just 2 tablespoons. Sounds odd, I know, but it’s like a little insurance policy to help the filling set up perfectly without being heavy or eggy.
For Dressing It Up (Because Why Not?):
- Fresh Berries: Whatever looks amazing and screams “eat me!” Raspberries are my personal obsession with this cake for the colour and tartness, but blueberries, strawberries, blackberries… go nuts!
- Powdered Sugar: A little fairy dusting just before serving. Instant fancy!
The Time Commitment: Patience is a Virtue (Especially with Cheesecake!)
Okay, let’s talk timing. This isn’t a whip-it-up-in-an-hour kinda deal. Making a truly great baked French cheesecake takes time, but most of it is hands-off. Promise.
- Fiddly Bits (Prep): Maybe 25-30 minutes? Crushing biscuits (therapy!), melting butter, mixing the filling… it’s actually quite relaxing.
- Oven Time: Plan for 60-70 minutes of baking. Your house is going to smell insanely good. Like, neighbours-knocking-on-your-door good.
- The Waiting Game (Cooling & Chilling): This is where your patience gets tested! It needs 1 hour to cool down gently in the turned-off oven. Then, the big chill: at least 6 hours in the fridge. But honestly? Overnight is where the real magic happens. The texture settles, the flavours deepen… it becomes that cheesecake.
Total Actual Work Time: Around 90-100 minutes, give or take. See? Not so scary! Think of the chilling time as the cheesecake’s beauty sleep. It needs it! Plus, it means you have to make dessert ahead – how convenient is that?! One less thing to stress about later.
Okay, Let’s Do This: Baking Your French Cheesecake Step-by-Step
Right then, sleeves rolled up? Apron on? Let’s turn these humble ingredients into French cheesecake glory. Follow along, you’ve totally got this!
Step 1: The Crusty Bottom Bit
First up, get that oven preheating to 180°C (350°F). Find your trusty 9-inch (23cm) springform pan and give the bottom and sides a quick swipe of butter or spray. Now, pulverize those biscuits! Food processor makes it quick, but honestly, popping them in a sturdy bag and whacking away with a rolling pin is way more satisfying. Mix the crumbs with the sugar (if using) in a bowl, then pour in that lovely melted butter. Stir stir stir until it looks like wet sand and holds together when you squeeze a bit. Dump it into your prepared pan. Use the bottom of a sturdy glass or a measuring cup to press these crumbs down really firmly and evenly across the base and maybe an inch up the sides. A solid base is key! Bake this for 10 minutes. Let it cool down on a rack while you deal with the filling.
Step 2: Whipping Up the Creamy Goodness
Grab your biggest bowl and your electric mixer (handheld or stand, whatever you’ve got!). Plop in the softened cream cheese. Beat it on medium speed until it’s completely smooth, like silk. No little white bumps allowed! Scrape the bowl down well. Now, with the mixer on low, gradually add the sugar. Keep mixing until it’s lovely and smooth again. Add the flour, mix just until it disappears. Next, the room temp eggs, one at a time, mixing on low speed only until the yellow yolk vanishes into the batter after each one. Seriously, don’t go crazy mixing here – we want creamy, not fluffy with air bubbles that could cause cracks! Finally, ditch the mixer and grab a spatula. Gently fold in the room temp sour cream (or crème fraîche), vanilla, and that gorgeous lemon zest. Fold just until you don’t see any more streaks. The batter should be thick, pale yellow, and look utterly divine. Resist the urge to taste too much… or don’t! Bowl-licking is a perk of baking.
Step 3: Baking Gently (Maybe Give it a Bath?)
Pour this luscious filling over your cooled crust. Smooth the top with your spatula so it’s nice and even. Now, for the optional but highly recommended water bath trick. This helps the cheesecake bake super evenly and is your best defense against cracks. Take two large sheets of heavy-duty foil. Carefully wrap them around the outside of the springform pan, coming well up the sides. Crimp it tightly – you’re creating a waterproof boat for your cheesecake. Place this foil-wrapped pan inside a larger roasting pan. Now, carefully pour hot (from the tap is fine, not boiling) water into the bigger pan. Fill it until the water comes about halfway up the sides of your cheesecake pan. Be super careful not to splash any water into the cheesecake! Very gently, slide the whole contraption into the hot oven. Bake for 60-70 minutes. The edges will look set, maybe slightly puffed, but the center (like, the inner couple of inches) should still have a definite wobble when you gently nudge the pan. That wobble is your friend! It means it’s perfectly cooked and will be creamy, not dry.
Step 4: The Slow Fade Cool Down
Okay, cheesecake’s baked! Now, turn the oven OFF completely. Don’t take the cake out yet! Just prop the oven door open a few inches – a wooden spoon handle stuck in the door works perfectly. Let the French cheesecake cool down slooooowly in the cooling oven for one whole hour. Think of it as gently transitioning back to room temperature. This is another big secret to preventing cracks! After the hour is up, carefully take the cheesecake pan out of the water bath (remember to remove the soggy foil!) and let it cool completely on a wire rack on your counter.
Step 5: Chill Out Time (The Hardest Part!)
Once it’s no longer warm to the touch, cover it loosely. You can use plastic wrap (try not to let it touch the surface or it might stick) or just pop the whole thing in a cake carrier if you have one. Now, clear some space in the fridge, because it needs to chill for at least 6 hours. I know, I know, it’s torture! But honestly, overnight is even better. This chill time isn’t just about getting it cold; it’s about letting the texture set perfectly and the flavours meld into something truly special. This is when it becomes a real French cheesecake. Be strong!
Step 6: The Grand Reveal and Adornment!
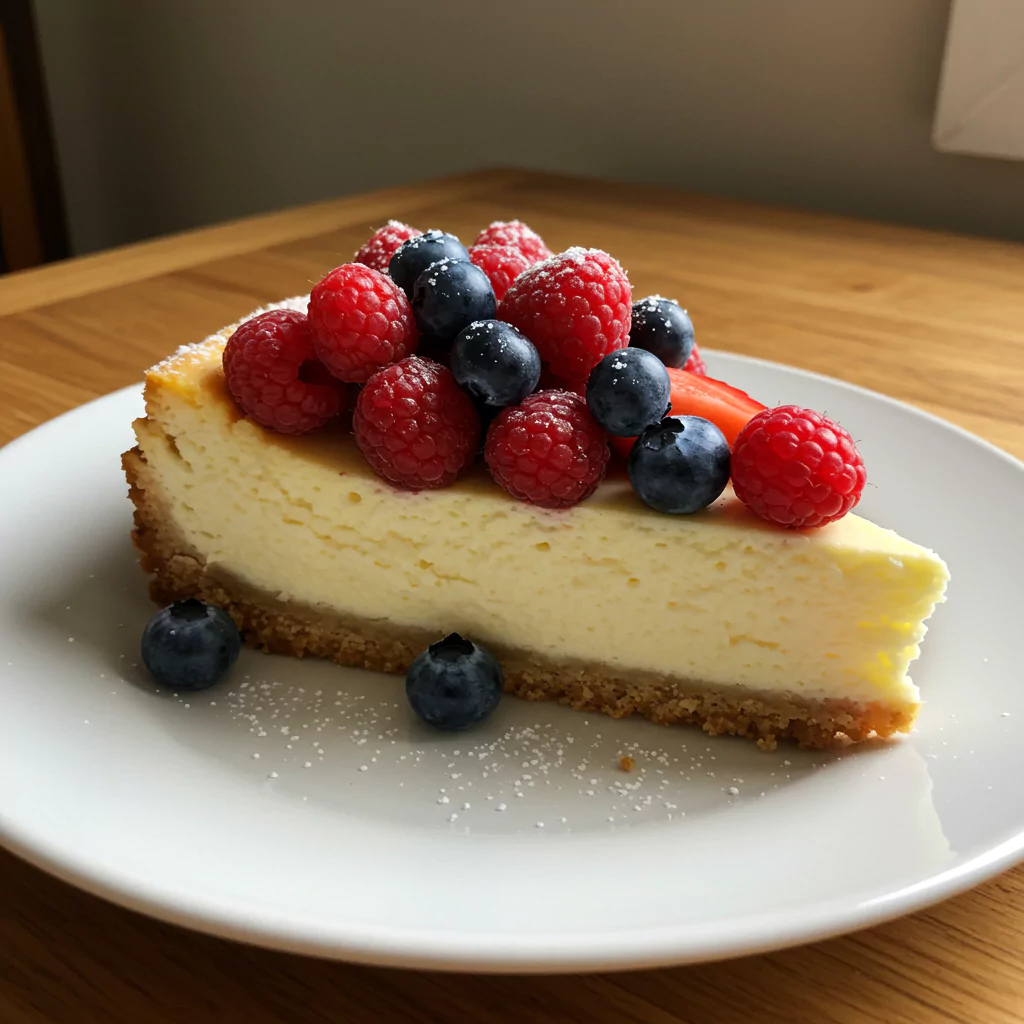
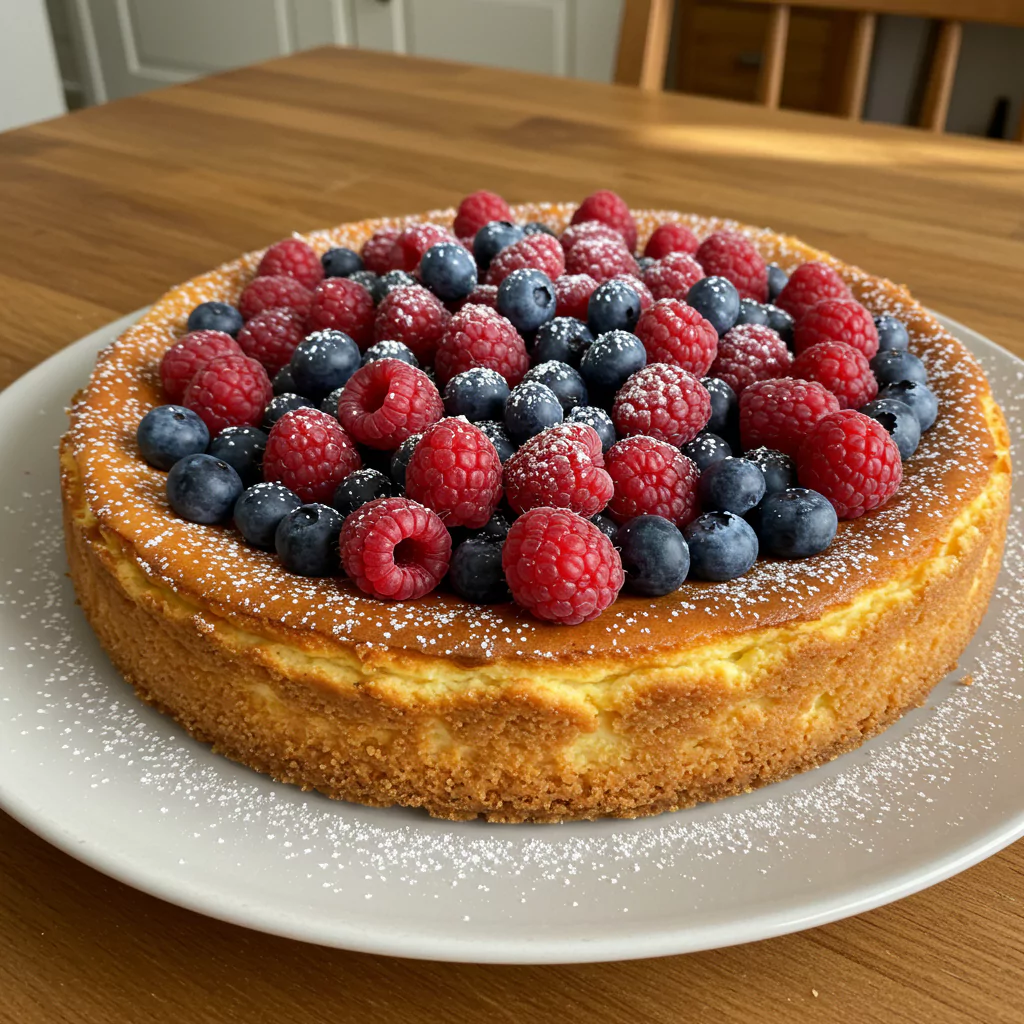
It’s time! Your patience has paid off! Just before you plan to serve it, run a thin, flexible knife or offset spatula around the inside edge of the pan to loosen the cake. Carefully undo the latch and lift off the springform ring. Ta-da! Look at your masterpiece! Slide it onto a pretty plate if you like. Now, the fun part: pile on those beautiful fresh berries. Don’t be shy! Then, grab a little sieve and give it a light dusting of powdered sugar. It just looks so effortlessly chic. To slice like a pro, have a jug of hot water and a cloth nearby. Dip a large, sharp knife into the hot water, wipe it dry, make a slice, and repeat for every single cut. Clean slices look so much better. Now, serve it up and bask in the glory. You did it! You made incredible French cheesecake!
Recipes You May Like
Ways to Serve Your Gorgeous French Cheesecake
Honestly, this French cheesecake needs very little help to shine, but here are a few ideas:
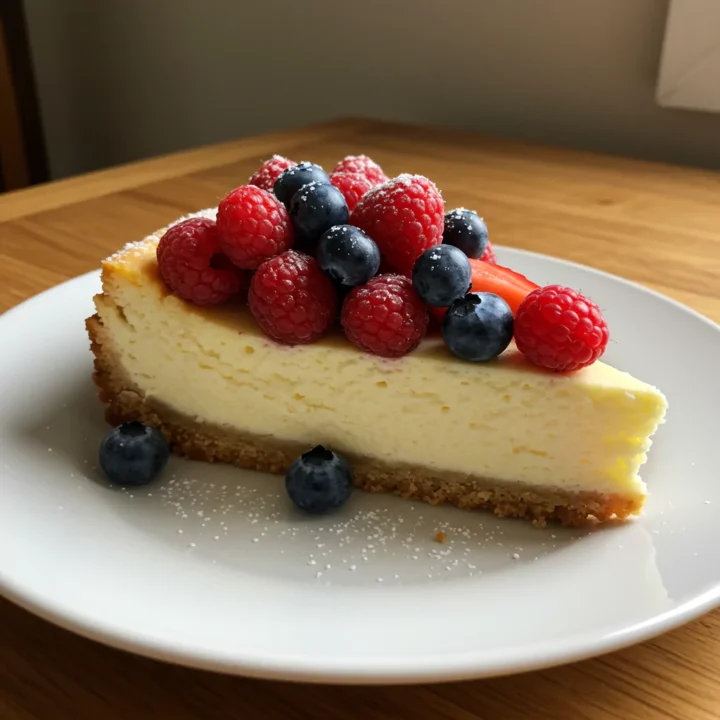
- The Classic: Seriously, you can’t go wrong with just a tumble of fresh berries (especially raspberries!) and that dusting of powdered sugar. It’s elegant, fresh, and lets the cheesecake be the star.
- A Little Saucy: A thin drizzle of raspberry coulis (just blended berries, maybe a squeeze of lemon and tiny bit of sugar, strained) is amazing. Or even a super simple chocolate drizzle if you’re feeling decadent.
- On the Side: A good strong cup of coffee is its soulmate. Here in Morocco, I absolutely love having a slice with a small glass of sweet mint tea – the combination is surprisingly perfect!
- My Two Cents: While sauces are nice, I usually just go heavy on the fresh berries. For me, the contrast of the tart, juicy fruit against the cool, creamy, tangy French cheesecake is absolute perfection. Why mess with perfection too much?
Keeping Your Cheesecake Happy (aka Leftovers!)
If, by some miracle, you have leftover French cheesecake…
- In the Fridge: Cover it well! Pressing plastic wrap gently against the cut edges stops them from drying out. Or use an airtight container. It’ll stay delicious for 3-4 days easily. (Though finding out requires immense willpower).
- Freeze It? Totally! Best to freeze it before adding toppings. Wrap the thoroughly chilled cheesecake (off the base if you can manage) super snugly in a double layer of plastic wrap, then a layer of foil. Pop it in the freezer for up to a month. Thaw it overnight in the fridge. The texture might be a fraction less light, but honestly, it’s still amazing cheesecake and perfect for emergencies!
- Make-Ahead Superstar: This cake wants you to make it ahead! Bake it a day or two before needed. Keep it covered in the fridge. Add the berries and sugar dusting right before serving so everything looks fresh and vibrant. You can even bake the crust a day before you make the filling if that helps break up the task!
Okay, Why Am I SO Obsessed With THIS French Cheesecake?
Look, I know I sound like a raving lunatic about this cake, but I just really love it, and I think you will too! Here’s the deal:
- The Texture is Everything: It nails that perfect balance – it feels rich and satisfying, but somehow still light and airy, not heavy like some cheesecakes that feel like a brick in your stomach. It just melts.
- It Tastes Real: It’s not just sweet. You get the creamy tang from the cheese and sour cream, that lovely hint of vanilla, and the zing from the lemon keeps it bright. It tastes sophisticated without being fussy.
- You Can Actually DO This: Baked cheesecake has this scary reputation, right? But this recipe, with all the little tips (room temp! slow cool! water bath maybe!), makes it totally manageable. And hey, if you get a small crack? Call it rustic charm and cover it with berries. No one will care once they taste it!
- It Looks Like You Tried REALLY Hard: Even with the simple berry topping, it just looks so elegant and impressive sitting on the table. Instant baking hero status, minimal stress required!
Seriously, please don’t be intimidated. Give this French cheesecake a whirl. It’s become my go-to for literally everything – birthdays, dinner with friends, celebrating Friday, consoling myself after a bad day… it just makes things better.
Now, I really want to hear from YOU! Have you ever braved a French cheesecake before? Any funny kitchen mishaps (please tell me I’m not the only one who’s dropped things!)? What are your absolute must-have toppings? Jump into the comments below – I’d genuinely love to chat, hear how yours turns out if you make it, or just talk about our shared love for amazing cake! Let’s build our little cheesecake-loving community right here.
Happy baking, my friends! Go make something delicious!
French cheesecake
Make this creamy, light French cheesecake! An easy recipe for authentic baked dessert perfection. Get tips & try this slice of bliss!
Ingredients
- 200g Digestive Biscuits (or Graham Crackers/Speculoos)
- 100g Unsalted Butter, melted
- 2 tbsp Granulated Sugar (optional)
- 600g Full-Fat Cream Cheese, softened completely to room temperature
- 200g Granulated Sugar
- 3 Large Eggs, at room temperature
- 200g Full-Fat Sour Cream or Crème Fraîche, at room temperature
- 1.5 tsp Pure Vanilla Extract
- Zest from 1 Medium Lemon
- 2 tbsp All-Purpose Flour
- Fresh Mixed Berries (like Raspberries, Blueberries, Strawberries)
- Powdered Sugar, for dusting
Instructions
Notes
Nutrition Information:
Yield: Makes 10 to 12 servingsAmount Per Serving:Calories: ~500 calories per slice
There are no reviews yet. Be the first one to write one.