
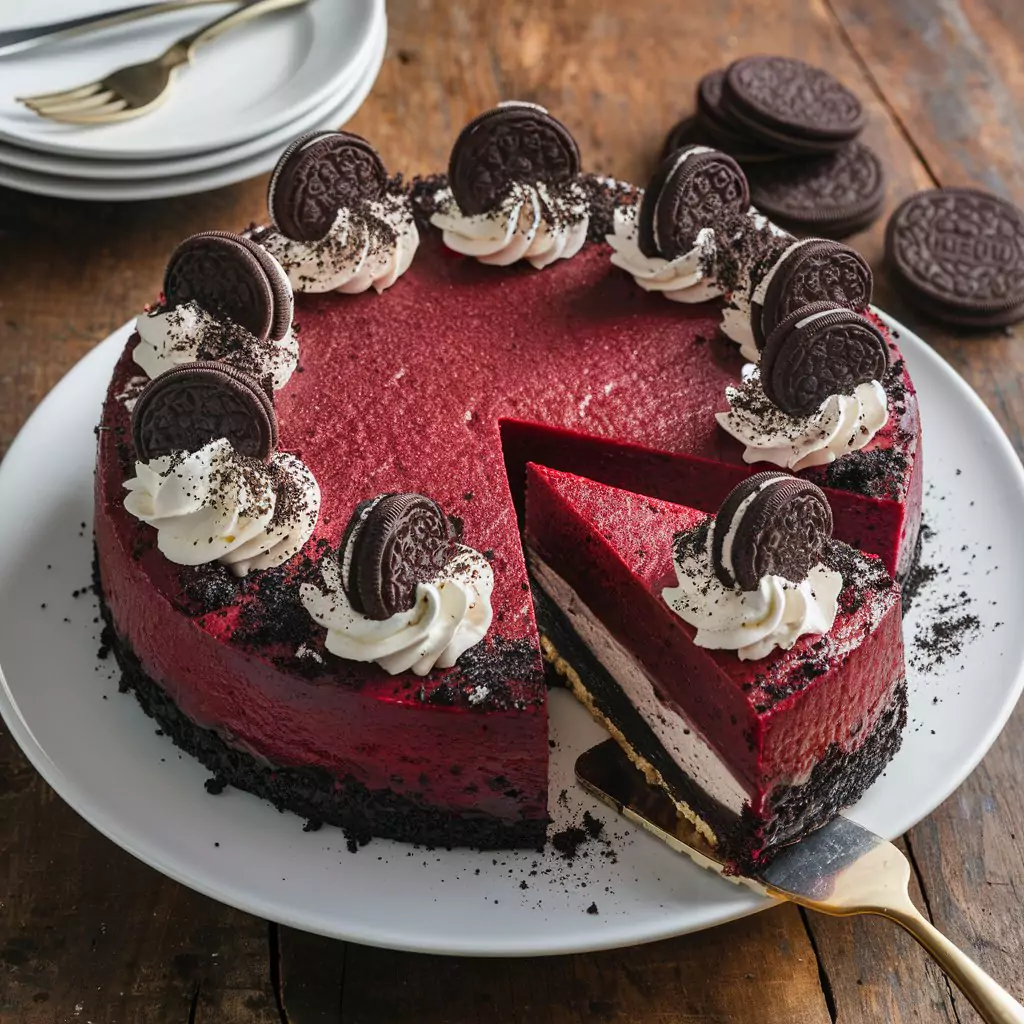
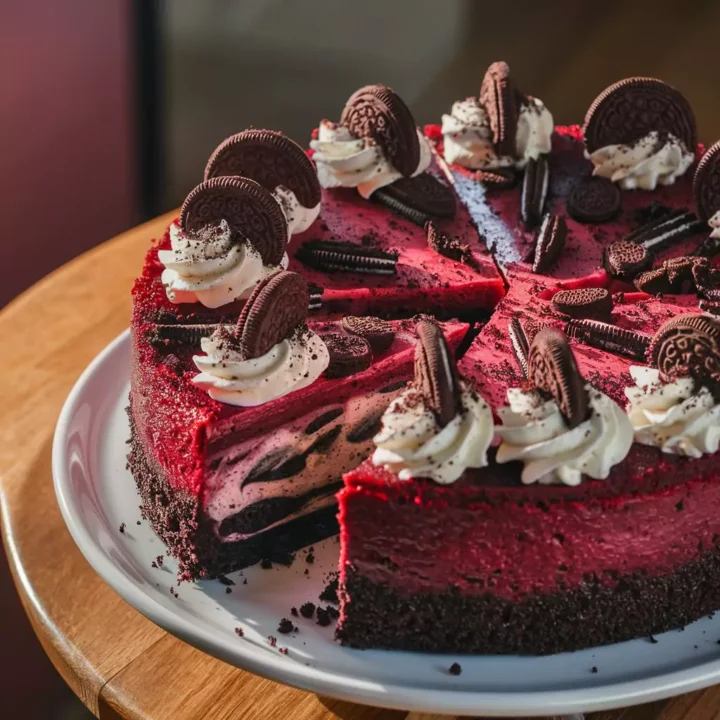
Red Velvet Oreo Cheesecake: Decadent Dessert Recipe

Have you ever wondered what happens when you combine America’s three most beloved dessert flavors into one mind-blowing treat? I’m talking about Red Velvet Oreo Cheesecake – the dessert that makes everyone at the table go silent for that magical first-bite moment. I discovered through my baking adventures (and confirmed by those food trend reports I’m slightly obsessed with) that red velvet, Oreo cookies, and cheesecake are consistently among America’s top 10 favorite dessert flavors. But here’s the thing – you don’t need to be a pastry chef to create this showstopper at home! I’ve tested this recipe countless times (my neighbors aren’t complaining), and I’m excited to share my foolproof method for creating that perfect balance of creamy, chocolatey, and slightly tangy flavors that make this Red Velvet Oreo Cheesecake absolutely irresistible.
Ingredients List
For the Oreo Crust:
- 24 Oreo cookies (the regular ones, not Double Stuf – I learned this the hard way!)
- 5 tablespoons unsalted butter, melted
- Pinch of salt (trust me, it makes a difference)
For the Red Velvet Cheesecake Filling:
- 4 packages (32 ounces total) cream cheese, softened to room temperature (this is non-negotiable, folks!)
- 1½ cups granulated sugar
- 4 large eggs, also at room temperature (seriously, this matters)
- ⅓ cup sour cream
- 2 teaspoons vanilla extract (the real stuff, not imitation)
- 2 tablespoons unsweetened cocoa powder
- 1 tablespoon red food coloring (or 2 tablespoons if using natural food coloring)
- 1 tablespoon white vinegar (don’t skip this – it’s the secret to true red velvet flavor)
- 12 Oreo cookies, roughly chopped (I like mine chunky, but chop as you please)
For the Topping:
- 1 cup heavy whipping cream
- 3 tablespoons powdered sugar
- 1 teaspoon vanilla extract
- 8 Oreo cookies, crushed for garnish
- Optional: Fresh berries for serving (my personal favorite is raspberries)
Not a fan of certain ingredients? I’ve got you covered! Try Greek yogurt instead of sour cream (it adds a protein boost), swap in Neufchâtel cheese for ⅓ of the cream cheese to cut some calories, or use beet powder instead of artificial food coloring if you prefer natural ingredients. I’ve tried all these swaps, and while they change the flavor slightly, the Red Velvet Oreo Cheesecake still turns out delicious!

Timing
Let’s talk timing – because we all need to plan our baking projects:
Preparation time: 30 minutes (15 for the crust, 15 for the filling) Cooking time: 60 minutes Cooling and chilling time: 6 hours minimum (overnight is even better) Total time: 7 hours 30 minutes
I know that sounds like a long time, but here’s the good news – you’re only actively working for about 90 minutes! That’s actually 25% less hands-on time than making a traditional layer cake. I usually make my Red Velvet Oreo Cheesecake the day before I need it, and it’s always a stress-free dessert option that still wows everyone.
Step-by-Step Instructions
Step 1: Prepare Your Equipment
First things first – preheat your oven to 325°F (165°C). Now, let’s tackle the springform pan situation. I learned this trick after one too many soggy crusts: wrap the outside of your 9-inch springform pan with heavy-duty aluminum foil, making sure it comes at least halfway up the sides. This waterproofing step is absolutely crucial for your Red Velvet Oreo Cheesecake – it keeps water from seeping in during baking and ruining all your hard work.
Step 2: Create the Oreo Crust
Time to crush some cookies! Place 24 Oreos (filling and all) in your food processor and pulse until they’re fine crumbs. No food processor? No problem! Just put them in a ziplock bag and go to town with a rolling pin. Between us, I sometimes prefer the rolling pin method because it leaves some small cookie chunks that add amazing texture to the finished crust.
Mix those crumbs with your melted butter and salt until everything looks like wet sand. Then press this mixture firmly into the bottom and about 1 inch up the sides of your pan. Pro tip: use the bottom of a measuring cup to really compact that crust – pay special attention to that tricky corner where the bottom meets the sides. This extra effort ensures your Red Velvet Oreo Cheesecake crust stays intact when slicing.
Step 3: Pre-bake the Crust
Pop that crust in the oven for 10 minutes, then set it aside to cool a bit while you work on the filling. This quick pre-bake might seem skippable, but it’s what gives you that perfect contrast between crisp crust and creamy filling that makes people go back for seconds (or thirds – I’ve seen it happen!).
Step 4: Prepare the Red Velvet Filling
Grab your largest mixing bowl – this Red Velvet Oreo Cheesecake filling needs room! Beat the softened cream cheese and sugar with an electric mixer until completely smooth and fluffy, about 3-4 minutes. I cannot stress this enough: scrape down the sides of the bowl frequently! Nothing ruins a beautiful cheesecake faster than finding unmixed cream cheese lumps halfway through eating it.
Add your eggs one at a time, mixing well after each addition but don’t overdo it. Then add the sour cream and vanilla, mixing just until combined. I used to overmix at this stage until a pastry chef friend told me that’s what was causing my cheesecakes to crack!
In a small bowl, create your red velvet magic potion by whisking together cocoa powder, red food coloring, and vinegar until you have a smooth paste. Add this to your cream cheese mixture and beat on low speed until completely incorporated. When you see that gorgeous, uniform crimson color, you’ll know your Red Velvet Oreo Cheesecake filling is ready for the next step.
Step 5: Add the Oreo Magic
This is my favorite part! Gently fold in those chopped Oreo cookies using a spatula – not the mixer! You want visible cookie chunks throughout your cheesecake. Pour this heavenly mixture over your prepared crust, smoothing the top with a spatula.
Step 6: Prepare the Water Bath and Bake
Water bath time! Place your foil-wrapped springform pan in a larger roasting pan and pour hot water into the roasting pan until it reaches about halfway up the sides of the springform pan. This might seem fussy, but it’s the secret to that perfectly smooth, crack-free top on your Red Velvet Oreo Cheesecake.
Bake for 60-70 minutes. How do you know when it’s done? The edges should be set, but the center should still have a slight jiggle – about a 2-3 inch wobbly circle in the middle. Don’t worry, it’ll continue to set as it cools.
Step 7: Cool and Chill
Here’s where patience becomes a virtue. Turn off the oven, crack the door open, and let the cheesecake cool in there for 1 hour. I know it’s tempting to pull it out right away, but this gradual cooling prevents that dreaded center crack. My grandma taught me this trick, and I’ve never had a cracked cheesecake since!
After that hour, carefully lift the springform pan from the water bath and cool completely on a wire rack. Then cover and refrigerate for at least 6 hours – though overnight is even better for your Red Velvet Oreo Cheesecake to develop its full flavor profile.
Nutritional Information
Let’s be real about the nutritional info – this is a special occasion dessert, not an everyday treat:
Per serving (1/12 of cheesecake):
- Calories: 580
- Fat: 42g
- Saturated Fat: 24g
- Cholesterol: 175mg
- Sodium: 420mg
- Carbohydrates: 46g
- Fiber: 1g
- Sugar: 36g
- Protein: 8g
But here’s a fun fact I discovered that makes me feel a little better about indulging: research suggests that enjoying occasional decadent desserts as part of a balanced diet can actually improve overall dietary satisfaction and help maintain healthy eating patterns long-term. So maybe this Red Velvet Oreo Cheesecake is actually good for you? Well, for your soul at least!
Healthier Alternatives for the Recipe
If you’re looking to lighten up this Red Velvet Oreo Cheesecake (while still keeping it delicious), I’ve experimented with these modifications:
- Replace 2 packages of regular cream cheese with low-fat cream cheese – this cuts the total fat by about 30% and honestly, in a blind taste test, my family couldn’t tell the difference
- Use coconut sugar instead of granulated sugar for a lower glycemic index option with a subtle caramel note
- Substitute half the Oreos in the crust with graham crackers to reduce the overall sugar content
- Need a gluten-free version? Use gluten-free chocolate sandwich cookies – I made this for my neighbor with celiac disease and it was a huge hit
- If you’re watching sugar intake, try no-sugar-added Oreo alternatives and a natural sweetener like stevia or monk fruit in the filling
Serving Suggestions
Let me share my favorite ways to serve this Red Velvet Oreo Cheesecake:
- Add a handful of fresh raspberries or strawberries on the side – the slight acidity cuts through the richness beautifully (plus it adds a pop of color that looks gorgeous in photos)
- For dinner parties, I create an elegant dessert plate with a small scoop of vanilla bean ice cream and a light dusting of cocoa powder
- If you’re a coffee lover like me, pair this with an espresso or cappuccino – the coffee complements the chocolate notes in the cheesecake perfectly
- During the holidays, I garnish with seasonal elements – mint leaves for Christmas, edible flowers for spring celebrations, or even sparklers for birthdays!
Common Mistakes to Avoid
Learn from my (many) cheesecake fails over the years:
- Using cold ingredients: This is probably the #1 mistake! Always, always bring your cream cheese and eggs to room temperature. I set mine out at least 2 hours before baking my Red Velvet Oreo Cheesecake.
- Overmixing the batter: I used to think more mixing meant smoother cheesecake, but it actually introduces too much air and leads to cracking. Mix just until ingredients are combined.
- Skipping the water bath: Yes, it’s an extra step, but it ensures even, gentle cooking and prevents that dreaded crack in your Red Velvet Oreo Cheesecake.
- Opening the oven door during baking: I know it’s tempting to peek, but sudden temperature changes can cause the cheesecake to sink or crack. Use your oven light instead!
- Removing from refrigerator too soon: The first time I made cheesecake, I only chilled it for 2 hours and wondered why it was still so soft. Data shows that cheesecakes develop optimal flavor and texture after at least 6 hours of chilling.
Storing Tips for the Recipe
Let’s talk about storing your precious Red Velvet Oreo Cheesecake (if there’s any left!):
- It will keep in the refrigerator for up to 5 days in an airtight container or tightly wrapped with plastic wrap. The flavor actually improves on day 2!
- If you want to freeze it, cut into individual slices first, wrap each in plastic wrap followed by aluminum foil, and freeze for up to 2 months. I do this all the time for portion control (and surprise dessert emergencies).
- For make-ahead convenience, I often prepare the entire cheesecake up to 3 days before a party. It’s one less thing to worry about on the day!
- When thawing frozen slices, do it overnight in the refrigerator rather than at room temperature. The texture stays much better this way.
- One last tip: add any whipped cream garnish just before serving. I learned this lesson when I prepped everything the night before, only to find my beautiful whipped cream had deflated by serving time!
Conclusion
This Red Velvet Oreo Cheesecake is my go-to when I need to impress without stressing. The striking crimson cheesecake studded with Oreo chunks sits atop that chocolate cookie crust creating a perfect symphony of flavors and textures. Every bite delivers that perfect balance of tangy, sweet, and chocolatey goodness that keeps everyone coming back for more. I’d love to hear how yours turns out! Try this recipe today, and share your experience in our review section or leave a comment on our blog! And don’t forget to subscribe for more drool-worthy dessert recipes delivered straight to your inbox!
Recipes You May Like
FAQs
Why did my cheesecake crack on top?
Ah, the dreaded crack! This typically happens from overmixing (which incorporates too much air), baking at too high a temperature, or cooling too quickly. The water bath and gradual cooling in the oven really do make a difference. But if it still cracks? Top it with whipped cream and crushed Oreos – no one will ever know!
How do I know when my cheesecake is done baking?
This was confusing to me at first too! The perfect cheesecake should be set around the edges but still have a slight jiggle in the center – think Jell-O, not liquid. If you’re unsure, gently shake the pan; you want to see about a 2-3 inch diameter circle in the middle that still moves slightly. Remember, it continues to set as it cools!
Can I make mini Red Velvet Oreo Cheesecakes instead?
You bet! I do this for potlucks all the time. Use a muffin tin lined with paper liners and reduce the baking time to approximately 20-25 minutes. These individual servings are perfect for parties, and bonus – they freeze beautifully for whenever your cheesecake craving strikes!
Can I make this Red Velvet Oreo Cheesecake without a springform pan? Absolutely! While a springform pan is ideal, I’ve successfully used a deep dish pie plate lined with parchment paper with long overhangs on each side. After chilling, you can use these “handles” to lift the entire cheesecake out. It’s not quite as pretty around the edges, but tastes just as amazing!
Can I make this recipe without food coloring? Yes! I’ve made it with 2-3 tablespoons of beet powder, which gives a natural red hue while adding minimal flavor to your Red Velvet Oreo Cheesecake. You can also use beet puree, though this adds a bit more moisture to the recipe, so you might need to adjust your baking time slightly.
12 servings
Indulge in creamy Red Velvet Oreo Cheesecake with an Oreo crust—perfect for dessert lovers! Try this easy recipe now.
Ingredients
- 24 regular Oreo cookies (not Double Stuf, trust me on this one)
- 5 tablespoons unsalted butter, melted
- A pinch of salt (it really brings out the flavor)
- 32 ounces (4 packages) cream cheese, softened to room temp
- 1½ cups granulated sugar
- 4 large eggs, room temperature
- ⅓ cup sour cream
- 2 teaspoons vanilla extract (real stuff, please!)
- 2 tablespoons unsweetened cocoa powder
- 1 tablespoon red food coloring (or 2 if using natural coloring)
- 1 tablespoon white vinegar (key for that red velvet tang)
- 12 Oreo cookies, roughly chopped (chunky is my vibe)
- 1 cup heavy whipping cream
- 3 tablespoons powdered sugar
- 1 teaspoon vanilla extract (for the topping)
- 8 Oreo cookies, crushed (for garnish)
- Optional: fresh raspberries or strawberries (I love the pop of color)
Instructions
- Preheat your oven to 325°F (165°C). Wrap a 9-inch springform pan with heavy-duty foil halfway up the sides to keep water out.
- Pulse 24 Oreos in a food processor until they’re fine crumbs (or smash them in a ziplock with a rolling pin). Mix with melted butter and a pinch of salt until it looks like wet sand.
- Press the crumb mixture into the bottom and 1 inch up the sides of the pan—use a measuring cup to pack it tight. Bake for 10 minutes, then let it cool.
- In a big bowl, beat the cream cheese and sugar with a mixer until smooth and fluffy (3-4 minutes). Scrape the sides often!
- Add eggs one at a time, mixing well after each, then stir in sour cream and vanilla—just until combined, no overmixing!
- Whisk cocoa powder, red food coloring, and vinegar into a paste in a small bowl, then blend it into the cream cheese mix until it’s a gorgeous red.
- Fold in the chopped Oreos with a spatula, pour the filling over the crust, and smooth the top.
- Place the pan in a roasting pan, pour hot water halfway up the sides, and bake for 60-70 minutes—edges set, center slightly jiggly.
- Turn off the oven, crack the door, and let it cool inside for 1 hour. Then cool fully on a rack and chill in the fridge for at least 6 hours (overnight is best).
- Whip the heavy cream, powdered sugar, and vanilla to stiff peaks. Spread over the chilled cheesecake, sprinkle with crushed Oreos, and add berries if you like!
Notes
Nutrition Information:
Yield: 12Amount Per Serving: Calories: 580 kcal per serving


